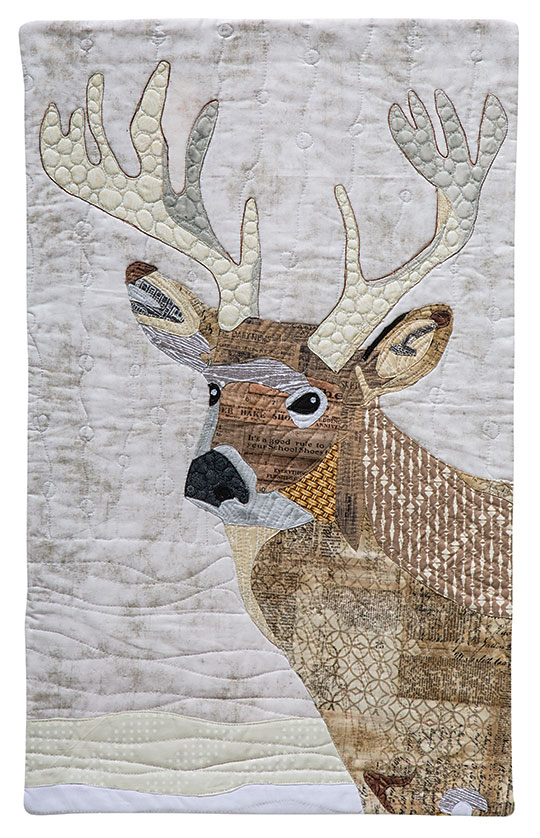
Paint-by-Number Whitetail Stag Wallhanging

By Kerry Foster
Class Description:
No previous appliqué knowledge is required, and this class is suitable for confident beginners as well as more seasoned quilters. Some experience with free-motion quilting and binding is useful, as this part will be largely done without guidance.
In this class you will learn the turned-edge appliqué method with glue and freezer paper, a fun way of piecing where sewing is optional and the supplies are inexpensive. You can even compose your quilts on your sofa, instead of by your machine. You will also learn about choosing fabrics for making contemporary-style animal portraits and easy free-motion quilting following nature’s lead.
At the end of the class, you will have a pieced, basted, and mostly quilted small wallhanging.
Class Length:
3 classes, 3 hours in length. Homework will be needed between classes 2 and 3.
Class Supply List:
In class 1, you will pick fabrics together, either as a shopping exercise (for a total of around 3 ½ yards depending on the store’s minimum cut) and/or curating the stash of the students.
As a guide, students will require:
- 5/8 yard – white solid/blender
- 3/8 yard – medium cream, dark beige solid/blenders
- Fat quarter – brown-gray, light brown solid/blenders
- 1/8 yard - pale cream, beige, medium warm brown, very light gray, medium brown, dark goldenrod, dark warm brown, dark gray, almost black, black solid/blenders
- 1/3 yard binding fabric (class 3 only)
- ¾ yard backing fabric (class 3 only)
- Batting scrap at least 22” x 33” (class 3 only)
Other supplies needed are:
- Paint-by-Number Quilts by Kerry Foster
- 1 yard freezer paper
- Sewline/Bohin/Fons & Porter Glue Pen
- Glue refill pack
- Numbered pins, or pins and small pieces of numbered paper, or numbered Ziploc bags to identify fabrics
- Mary Ellen’s Best Press or spray starch (class 3 only)
- 90/14 machine needles (class 3 only)
- Safety pins for basting (class 3 only)
- Spray baste (optional – class 3 only)
- Polyester and/or cotton threads close in color to your fabric choices (class 3 only)
- Brown perle cotton for adding backstitch around the antlers (optional – class 3 only)
- Masking tape (optional – for aiding tracing in class 1)
- Small, sharp straight scissors, such as appliqué, Microtip, or embroidery scissors
- Fabric shears OR small cutting mat and 28² rotary cutter
- Paper scissors
- Permanent marker pen
- Sewing machine with a darning or free motion foot (class 3 only)
- Bag or tote large enough to accommodate the project without folding too much (optional, but very useful for ensuring you don’t have to make repairs to glued pieces later on)
Classroom Preparation:
An ironing station between two students is especially useful in classes 1 (if you have quick students) and 2. Students will require a double workspace in which to comfortably draw their templates and piece their deer.
Class Agenda:
Class 1
- Look at the fabrics brought in by students or shop for fabric referring to the color key and pp. 8–9. Lay out and make sure there is enough variety in shade before making final decisions.
- Number the fabrics.
- Trace the pattern onto freezer paper with a permanent marker, note color references, and make alignment marks (p. 10).
Class 2
- Build the appliqué, following pp. 11–13.
- Discuss stitching (p. 14), although this class plan is written with the assumption that students will not be piecing by machine.
- Project will need to be finished at home before class 3 if not completed in the allotted time.
Class 3
- Spray starch and press quilt to make larger areas more rigid and less prone to shifting when quilting.
- Baste the quilt sandwich.
- Quilt according to pp. 28–29. Your students will likely need to finish the quilting and apply binding at home.


