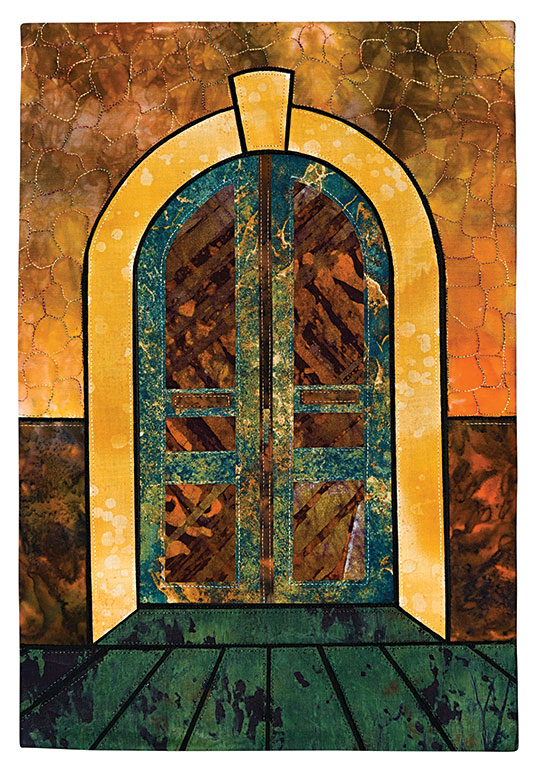
Old Doorway Project

From Fabulous Facades—Create Breathtaking Quilts with Fused Fabric
Class Description:
Many people have a collection of doorway images. These could be images from a holiday or even some zany colorful door you have found in your neighborhood. This class will give you a technique to recreate those doorway images in fabric. Start with the pattern provided; then, after working through the process, you will be equipped to make some of your own designs. These make wonderful gifts, but be careful: I became addicted to making small doorway quilts.
This is an intermediate-level class. Skills learnt in class include breaking a design down into manageable steps, outlining areas of the building with a black line, construction (including appliqué and stitching), quilting, and finishing the small quilt with a 'Faced Edge.’
The small doorway project will be constructed with the possibility of the quilting and edges to be completed after class.
Class Length:
This can be taught as a one-day class when everyone uses the pattern. Alternatively, it could be taught as two 3-hour sessions.
Class Supply List:
Fabric requirements:
- 1/2 yd of dark batik fabric for outlining
- One fat quarter for wall
- One fat eighth for inside door panels
- One fat eighth for door framework
- 8” x 8” side panels
- One fat eighth for paved foreground
- 12” x 18” for arch
- 1/4 yd for facing
- Fat quarter for quilt backing
Other Supplies:
- Freezer paper: 1/2 yd
- Tracing paper; 1 sheet, 13” x 18”
- Fusible web: 1 yd of 24” or 18” Lite Steam-a-Seam 2 or similar product
- Batting: 16” x 21”
- Threads to blend with selected fabrics, plus a reel of black thread size 50 (variegated threads work well)
- Fabulous Facades—Create Breathtaking Quilts with Fused Fabric by Gloria Loughman (there is a whole chapter on making quilts based on doorways; there is also another downloadable pattern, plus heaps of images of fascinating doorways for inspiration)
- Sewing machine in good working order, plus machine manual, tools, and accessories including a darning foot, ¼-inch foot, and walking foot. (optional: Open-toed embroidery foot)
- Pencil (2B), pencil sharpener, eraser, sticky tape, and a black, fine-point Sharpie
- Pins
- Rotary cutter, board, and ruler
- Fabric scissors
- Small, very sharp scissors
- Paper scissors
- Quick unpick/seam ripper
- Size 70 and 80 topstitch machine needles
- Fine fabric-marking pen (eg. Sewline fabric-marking pencil)
Classroom Preparation:
Each student needs a clear area to work. Encourage students to not set up their sewing machines before class so that they have a good working space. Photocopy the pattern to the correct size, one copy for each student (pattern on p. 104). I would also encourage the teacher to make a sample, working through the process before class.
Class Agenda:
1. Work through the steps outlined in the book, beginning with the preparation section. This will include tracing the pattern onto tracing paper and preparing the freezer paper patterns.
2. Follow the directions for construction, which include preparing the bases in the dark fabric, making the walls, making the door, making the arch, and constructing the foreground.
3. Stitch around each segment. Encourage students to use the correct size needle for their thread (see p. 50).
4. The next step, trimming, is very important, and it should be highlighted to students that this only occurs at this stage, not earlier in the process. Before the edges are trimmed back, remind students that they need to be stabilized with the addition of a strip of Lite Steam-a-Seam 2 on the back before cutting.
5. Finally, it is time to put it together. After making an appropriately sized sandwich, mark the correct placement of the tracing paper pattern on the batting (p. 103).
6. Follow the steps to overlay the segments in order.
7. Add details and finish the quilt. The information about adding the details is on page 104, as is advice for quilting. Check page 95 for advice on finishing with a 'Faced Edge.'


