

Walking Foot Quilting: Circular Spirals
Posted by Carol Wilhoit on Jun 25th 2024
I have quilted many quilts and small projects with my walking foot. Since the feed dogs are left up, it is easy to get stitches where you want them. The learning curve for walking foot quilting is short, and it is easy to finish your own quilts with great results.
While the walking foot can be used for many quilting techniques, one of my favorites is the circular spiral.
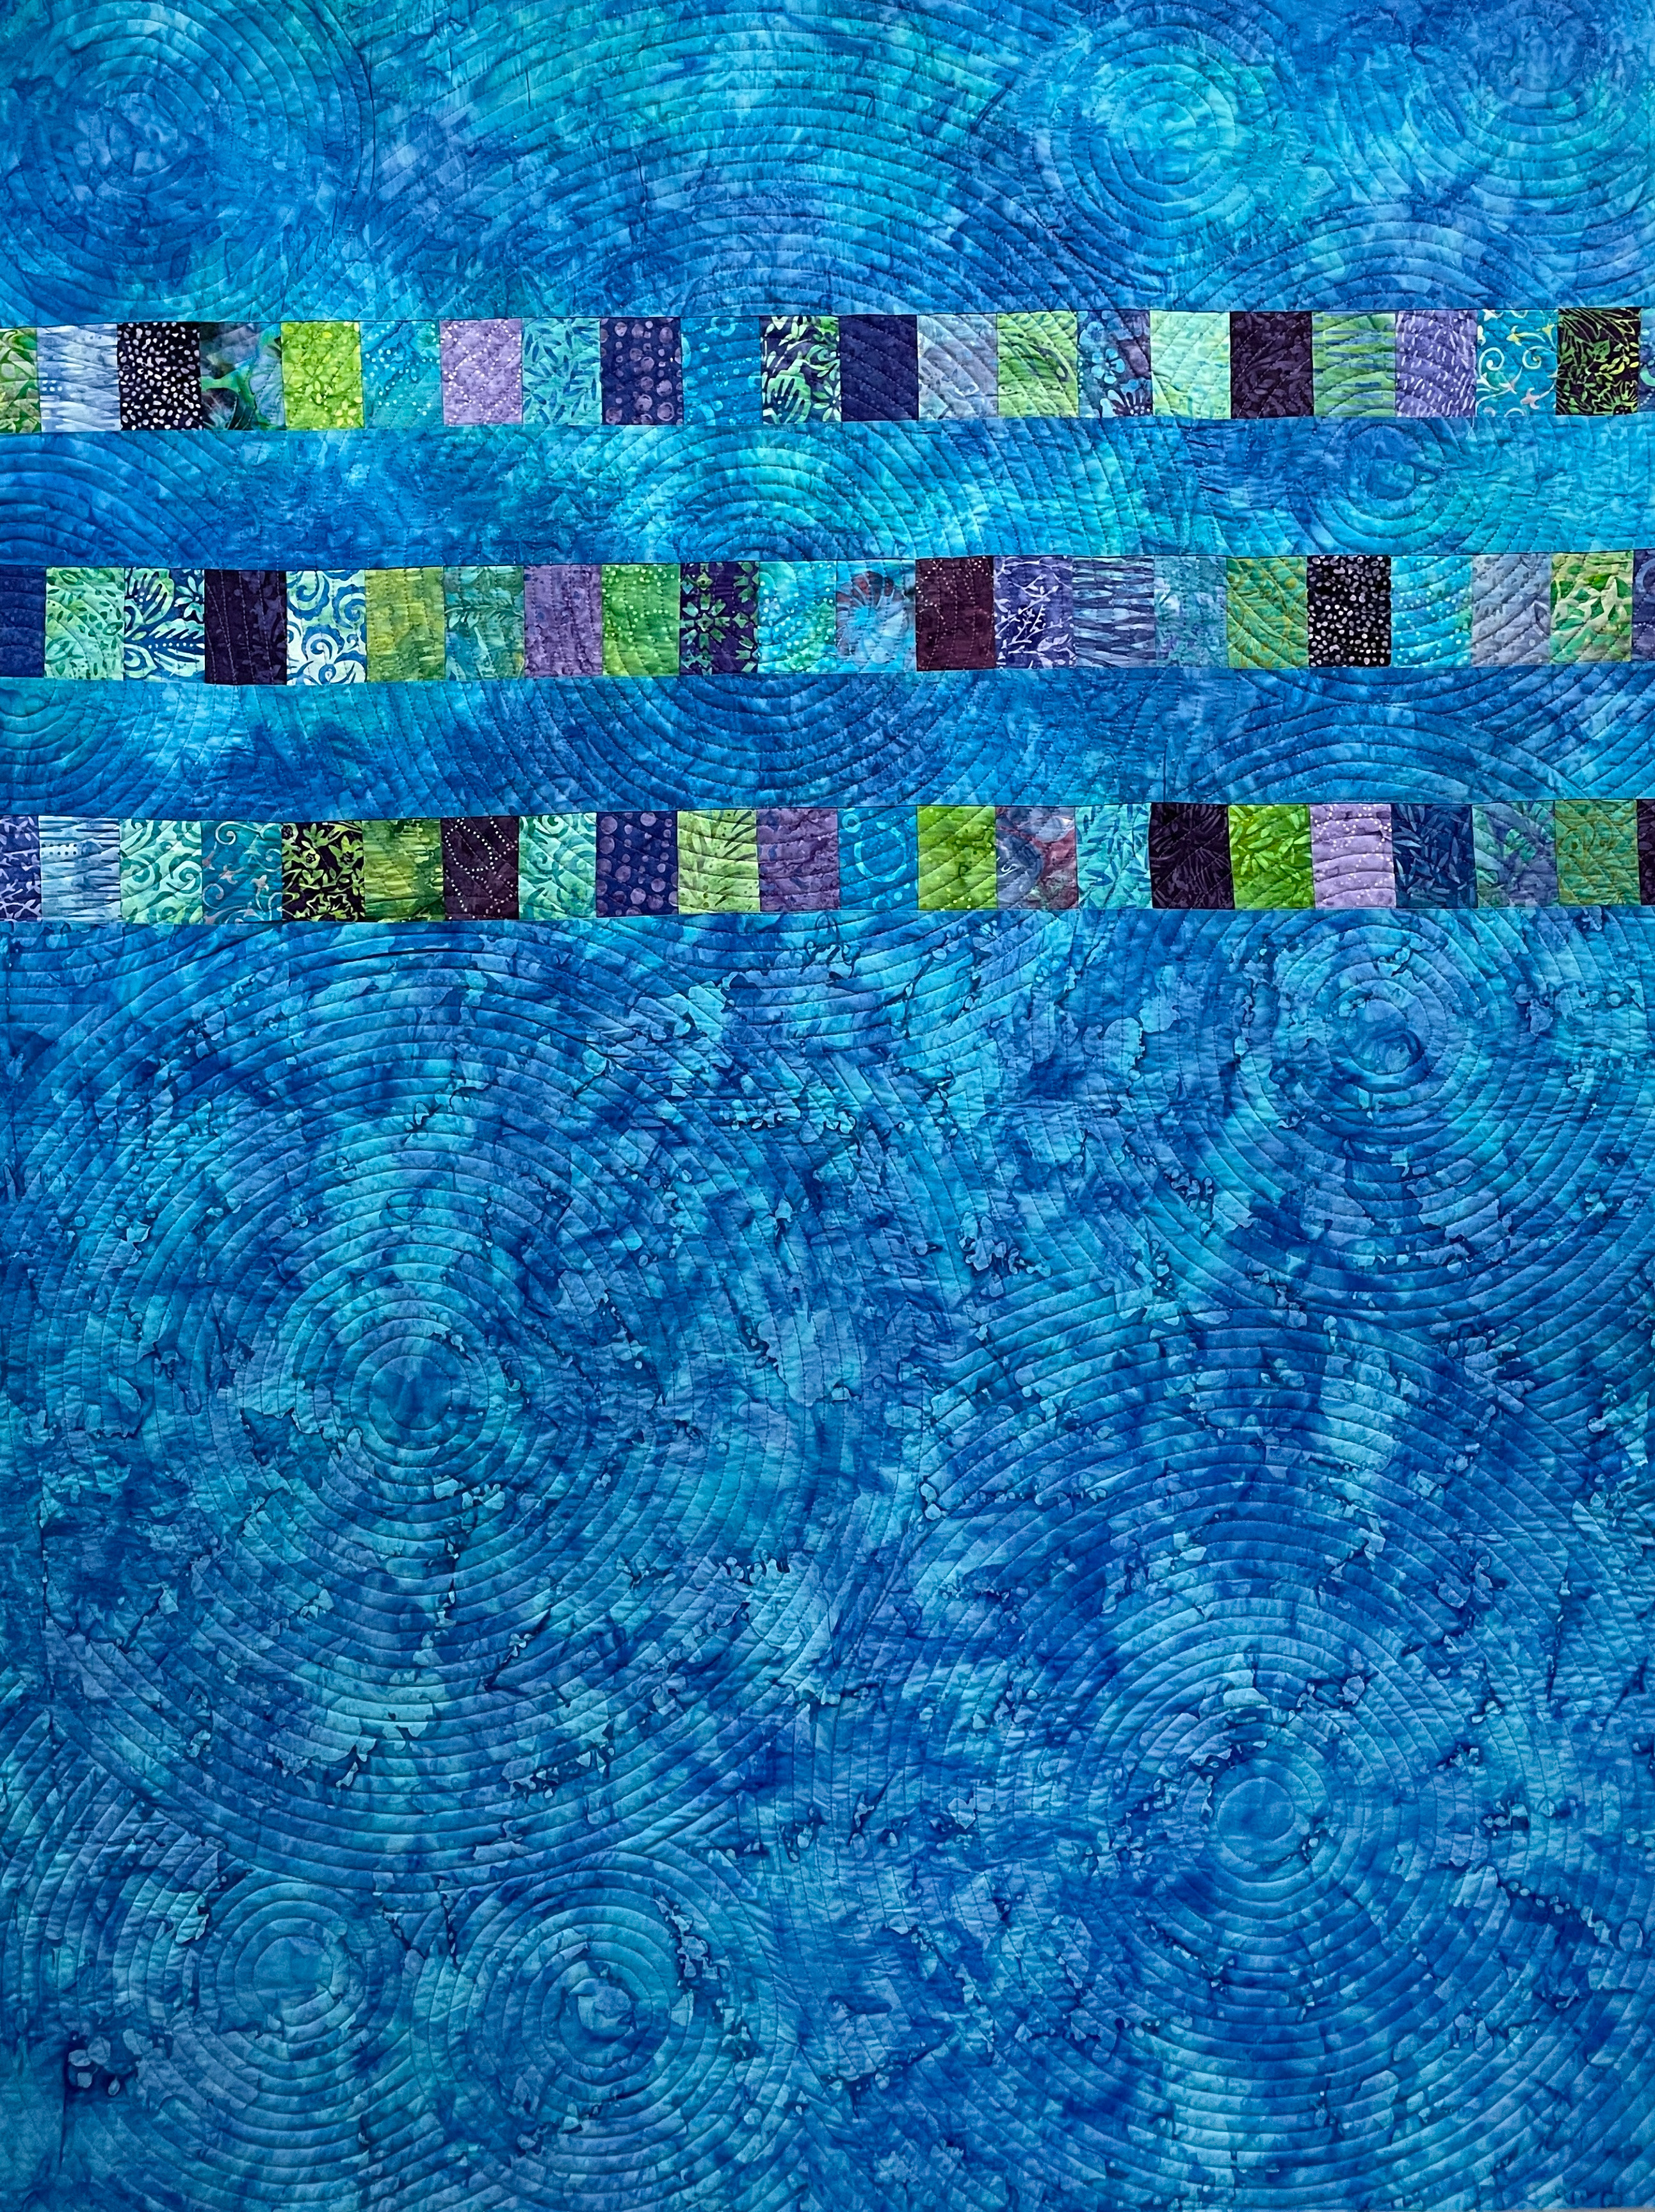
Image Caption: The back side of this quilt shows the beauty of covering the surface with many circular
spirals. The lilac-colored thread contrasts enough for the stitching to show well.
There are a few considerations before you begin stitching.
- I start by marking a small spiral so that I get off to a nice round start. For a free spiral template, go to the Class Resources tab on my website.
- On a large quilt, stitch a clockwise spiral. (A counterclockwise spiral is more difficult to stitch since there is more of the quilt in the harp space.)
- Consider the thread color. The quilting barely shows if the thread matches your fabric precisely. I sometimes choose thread that is a different color but is close in value (lightness/darkness) to the quilt fabrics. The contrast in color helps the stitching to show while the similarity in value keeps the stitching from being too prominent.
- Test your marking tool to be sure that the marks come out.
- Stitch a few samples of a spiral before beginning an actual quilt. The hardest part of the spiral is the center, where the curve is most tight. As the spiral becomes larger, the curve is more gentle and easier to stitch.
- When stitching a spiral, you will turn the quilt around many times. Be sure the layers are well basted.
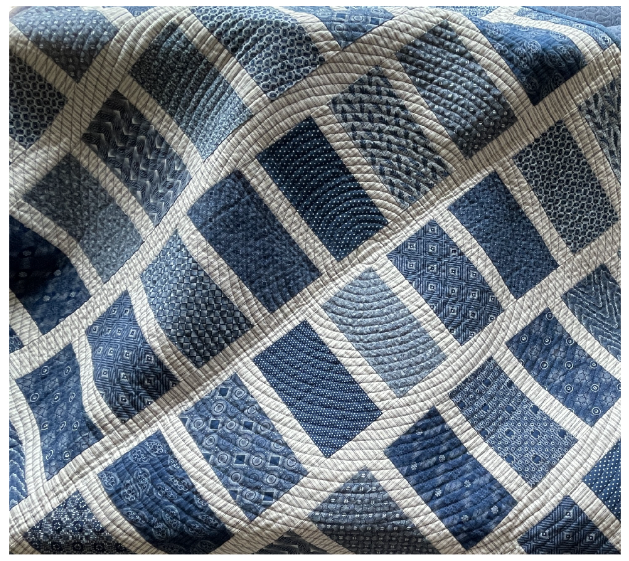
Image Caption: This quilt, made with African indigo-dyed fabrics, was quilted in one large spiral with thread that is very close in color to the indigo prints. The quilting is hard to see in a photo of the flat quilt. Here you can see how the spiral gets larger and larger as it approaches the edges of the quilt.
Stitch the circular spiral as follows:
1. Place the template where you want the center of the spiral. With a removable marker, trace a few rounds of the spiral onto the quilt top.
2. With the walking foot, start stitching in the center of the spiral. Place your needle at the start of the marked line and bring the bobbin thread to the top of the quilt. Bury the thread tails after stitching the spiral.
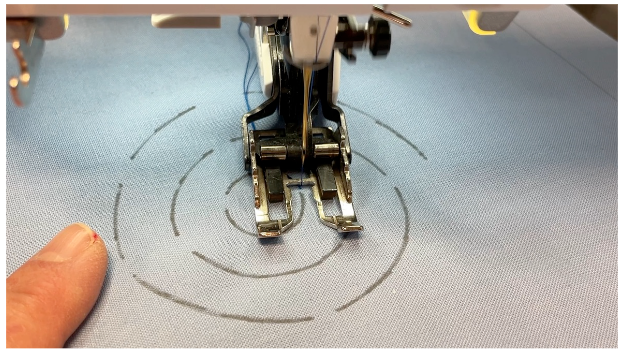
Image Caption: After pulling my bobbin thread to the top of the quilt, I’m ready to stitch the spiral on the
marked line.
3. Slowly and carefully, stitch right on the marked line. Take one or two stitches at a time and then raise the presser foot and turn the quilt. Repeat this process over and over. As the spiral becomes larger, you can take more stitches before stopping to pivot.
4. As you approach the end of the marked spiral line, begin to position the left edge of the walking foot along the previous stitching line. Continue stitching, aligning the foot with the outer edge of the stitched spiral. TIP: The walking foot has a straight edge, so the whole foot will not line up with a curve! Align the part of the walking foot that is directly to the left of the needle with the previous stitching.
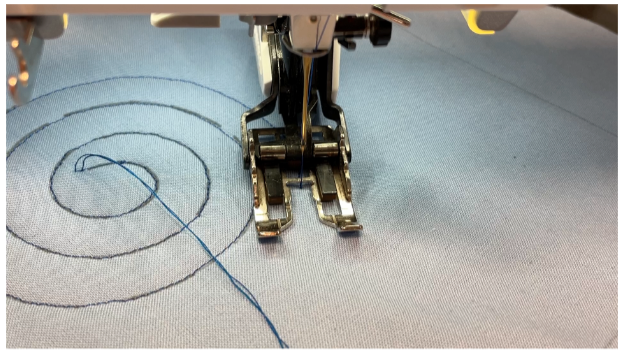
Image Caption: I stitched to the end of the marked line, then continued stitching by lining up the left
edge of the walking foot with the previously stitched line.
5. Continue until the spiral is as large as you want. I have quilted several lap-sized quilts by filling the entire surface with one large spiral. A quilt also looks great when quilted with multiple smaller spirals.
Check out my Creative Spark class, Walk Around the Block: Machine Quilting with the Walking Foot for step-
by-step videos and more tips for quilting a circular spiral. The class also contains
general information about quilting with the walking foot and multiple other walking foot
techniques.
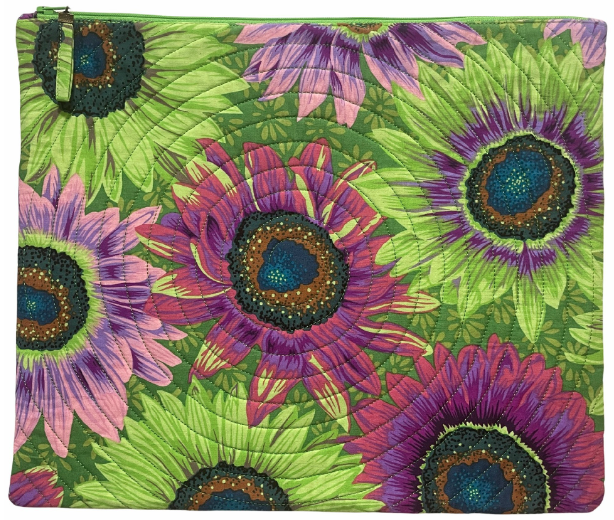
Image Caption: Here is a file folder-sized zipper portfolio, quilted with a circular spiral.
...
Carol Wilhoit a retired physician, channels her technical mind into quilting, striving to simplify construction for better results. She excels in organizing and utilizing fabric stashes, enhancing the joy of quilting. Passionate about small projects like zipper bags and table runners, she loves the creativity they inspire. Carol delights in sharing her quilting wisdom, witnessing students' "Aha!" moments as they discover easier techniques for stunning results.
Creative Spark Course: Walk Around the Block: Machine Quilting with the Walking Foot


