Sewing Four-Patches with Bonnie K. Hunter
Posted by Bonnie K. Hunter on Jul 13th 2016
Hi everyone! Happy July to all of you!
I’m here on the C&T blog for a little refresher on simple unit success. Easy units such as four-patches, nine-patches, and half-square triangles are the building blocks of more complex designs. If you break down many quilt blocks into their individual components, you’ll find these simple units laying the groundwork for how the rest of the block comes together.
If you were to stop me on the street and ask me what my favorite block is, I’d tell you right off the top of my head... a four-patch!
Four-patch units can be dynamic, classy, whimsical, scrappy, or understated... and it all depends on how you personally shade them to place them in the block.
You can do four squares all from one color family in each four-patch. You can do scrappy lights and darks. You can do one background and one foreground. You can do three squares of one color, making the fourth corner an accent square.
I will never tire of the simple four-patch. It may be simple, but it gives your block a lot of bang for the buck!
SOMETIMES, BUT NOT ALWAYS, we can spin the seams on the back side of the four-patch to facilitate nested seams where the four patches will be joining each other.
Here are some tips and photos for simple four-patch success:
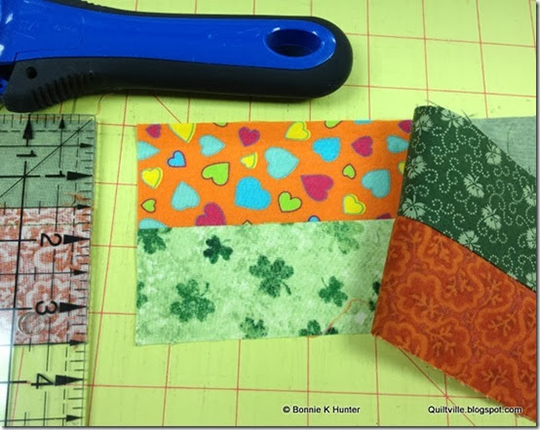
It all starts with the cutting! If you missed my post on Making the Best Cut on the C&T blog, you will find it HERE.
I like to work with short strip sets when making scrappy four-patches, so I can build my variety as I go. I always sew a test seam to make sure my strip sets are coming out the correct width before I get started. Better to check early on than to sew them all only to find out my seam allowance wasn’t correct.
Make the job of cutting super easy by pairing two strips right sides together so they are ready to cut in matched pairs. I match the pieces that are going to end up next to each other during the cutting process so that when I get to the machine things are ready to sew.
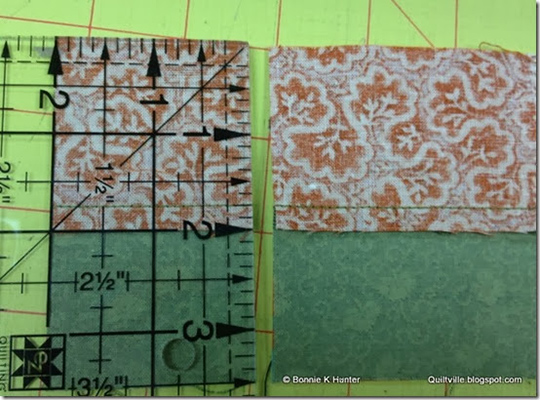
Here I’m making 3"-finished four-patches for my Celtic Solstice quilt, which ran as a mystery quilt on my blog. Two 2" strips sewn side by side should give you a strip set measurement of 3 1/2". If it doesn’t, fix the seam before you carry on.
The direction you feed four-patches into the machine MATTERS! Take a look:
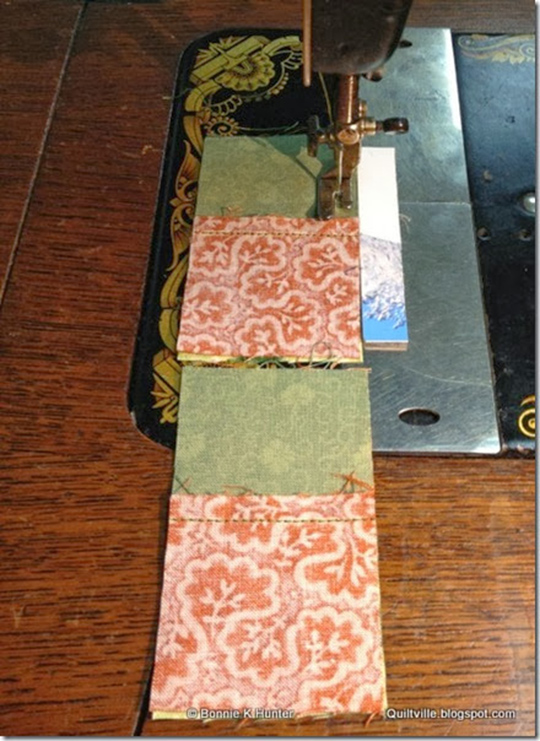
These pairs are being fed with the top seam allowance pointing up toward the needle. This way the bottom seam allowance will not fight with the feed dogs or get flipped the other way in the process of sewing. Because the seam on the top is pointing up toward the needle, I can easily control it. If the four-patch were fed the other way, with the top seam allowance pointing down, the one underneath would be catching the feed dogs where I couldn’t see it or control it, and let’s face it, in quilting, sometimes Shift Happens!
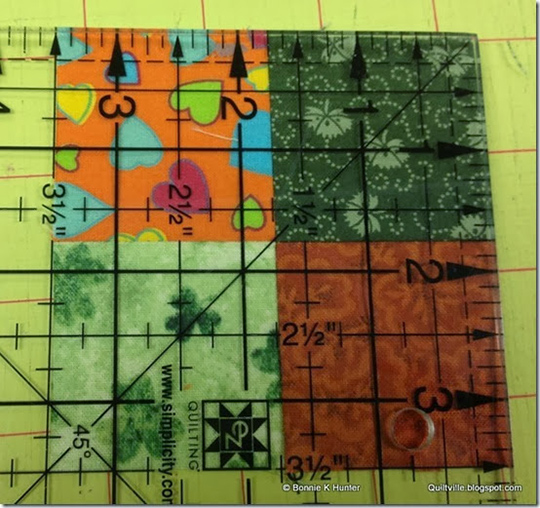
I KNOW my seam is where it needs to be when the units measure the size they need to measure. There should be LITTLE sliver trimming happening at this point, if any at all. These units measured 3 1/2" like I wanted them to. Hooray! Do what you can in the cutting and the seaming process so that units come out the right size the first time. If your units are consistently too big, it means your seam allowance is not wide enough. Fatten it up. If your units are too small, put that seam allowance on a diet!
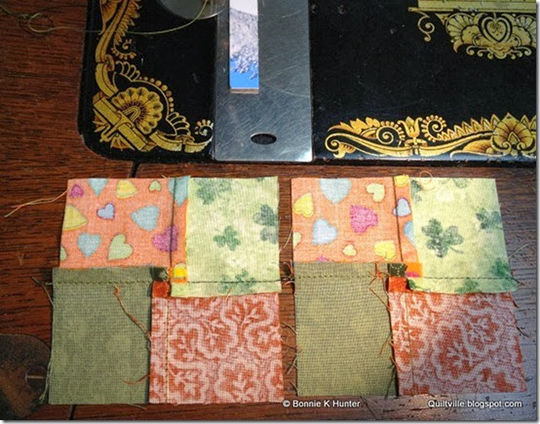
Let’s spin those seams! I know this technique has been around for a long time, but in the beginning, I couldn’t figure out WHY half of my four-patches would spin clockwise, and the other half would go counterclockwise. There seemed to be no rhyme or reason, and it meant that when I sewed four-patch to four-patch, my seams wouldn’t butt and oppose any more, and it drove me nuts. Are you with me?
It all goes back to how the pairs are fed through the machine! If you want your four-patch seams to all go around in the same direction… they have to be fed through the MACHINE the SAME way when you are joining the two-sies! SERIOUS!
To get them to pinwheel like this, I grab the four-patch with the center seam going side to side as shown. Hold the seam allowance DOWN on the right, and UP on the left. A quick twist will let a couple stitches loose within the seam allowance and allow you to spin them around. Which way will yours go? Look at the TOP seam allowance to see which way it is pointing. In this case, they are pointing right, so mine will go clockwise.
To Spin or Not to Spin... That Is the Question!
Do I always spin four-patch seams? If the spinning seams on the back of the four-patch will nest with the units I am sewing them to, or if there is no seam that they need to match to at all within the unit, such as in a plain square, then YES. I am a spinner.
However, there are some blocks where spinning seams will NOT work.
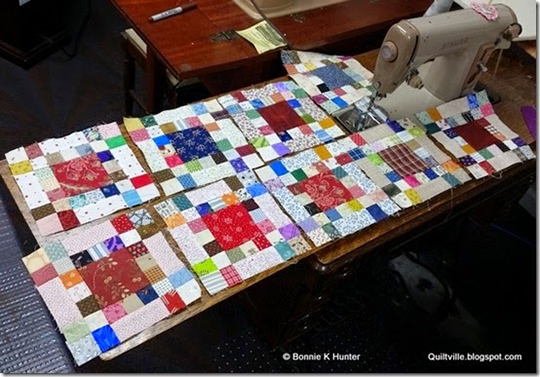
This block is called Idaho Square Dance and is featured in the quilt by the same name in my new book release called Addicted to Scraps. Be watching for it SOON! Because the pieced bars around the center needed to be pressed a certain way, the four-patches in the corners would NOT work with the spinning method.
There is a time to spin and a time to not—always check your block to see if it helps or hinders your progress.
I hope this info is helpful to you, and as always, if there is something you’d like to see me post about in the future, please leave a comment below! Your question may be featured in a future post!
Bonnie K. Hunter is the author of several C&T titles, including Scraps & Shirttails, Scraps & Shirttails II, String Fling, Adventures with Leaders & Enders, and More Adventures with Leaders & Enders.
Bonnie is also the Addicted to Scraps columnist for Quiltmaker magazine, giving hints, help, and tips in every issue to help put your own Scrap User's System to good use, making more quilts in less time.
Follow Bonnie's daily blog at http://quiltville.blogspot.com.
Facebook: http://facebook.com/quiltvillefriends
Facebook Group: Quiltville's Open Studio
Instagram: @quiltville_bonnie


