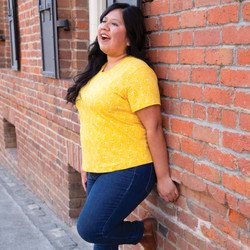
How to Use Your T-Shirt Pattern to Make a Tank Top
Posted by Tova Opatrny on Dec 6th 2022
For a lot of people, sewing patterns are the foundation for creating garments. When I was first learning to sew, I thought patterns were to be followed precisely with no deviation. Otherwise, the project could be a total disaster and I would be stuck strutting around town in poorly sewn fabric scraps. The truth is, once you become familiar with patterns, adjusting and altering them isn’t hard at all.
Do you know there’s a pattern two-fer in the book, Professor Pincushion’s Beginner Guide to Sewing: Garment Making for Nervous Newbies? It’s true! You can follow the book’s instructions to get a T-shirt with the included downloadable pattern.
Or you can take a little detour and end up with a tank top.
I’m going to show you how it’s done. First let’s take a look at our pattern pieces and the different parts of it.

For a tank top, we don’t need sleeves so we can set that pattern piece aside. We’ll bring in the edge of the shoulders a bit on our pattern, a little pattern alteration if you will.

It’s easy. Grab your front and back pattern pieces, a pencil, and your sewing gauge. From the edge of the armhole at the shoulder, mark in a half inch on the FRONT pattern.

Then blend a line from the mark to the armhole, like this:

Cut on your new line and repeat the same process with the BACK pattern, using the same measurement as you did for the front.

Congratulations! You just altered your pattern. We just did a small alteration to bring in the edge of the shoulder in a bit. But you can always experiment to make bigger alterations, like making the shoulders more narrow, or bringing up the hemline, or changing the shape of the neckline.

Cut out your pieces as normal using the same layout in the book (minus the sleeve) and follow all the same steps until you get to the sleeve step. Instead of following that, we’re going on that tank top detour. (Also, the notches on the armhole no longer apply, so it’s okay if you cut them off.)
Next, have your shirt wrong side out. On each armhole, fold over to the wrong side half an inch. Pin and press. Take the raw edge and tuck it under so it meets the fold. Pin and press again. This is called a double fold narrow hem.

Take it to your machine and stitch it in place. I like to use a narrow zig zag or stretch stitch so that the armhole still can stretch. And that’s it!

You can finish with the rest of the t-shirt steps in the book to complete your tank top. Great job!

...
This blog post is written by Tova Opatrny, Author of Professor Pincushion’s Beginner Guide to Sewing: Garment Making for Nervous Newbies.
About Tova Opatrny
Tova Opatrny co-founded the website Professor Pincushion and YouTube channel, providing high-quality video tutorials for beginners since 2009. She resides in Central Oregon and is the owner of an impressive fabric stash and thread collection. Her debut book, Professor Pincushion’s Beginner Guide to Sewing: Garment Making for Nervous Newbies, is available for purchase at book retailers and online.
Shop Professor Pincushion's Beginner Guide to Sewing
WANT MORE CREATIVE CONTENT? SIGN UP AND RECEIVE 30% OFF YOUR FIRST ORDER.


