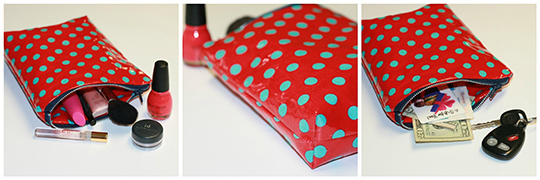
Happy Pouch Tutorial (& Modern Prairie Sewing Giveaway!)
Posted by Abigail Long on Sep 1st 2015

It's National Sewing Month! To celebrate, we're bringing you free tutorials, tips, interviews, and videos from your favorite authors all month long.
Please welcome Abigail Long, who is kicking off the celebratory month with a tutorial on her Happy Pouch!
Take it away, Abigail!
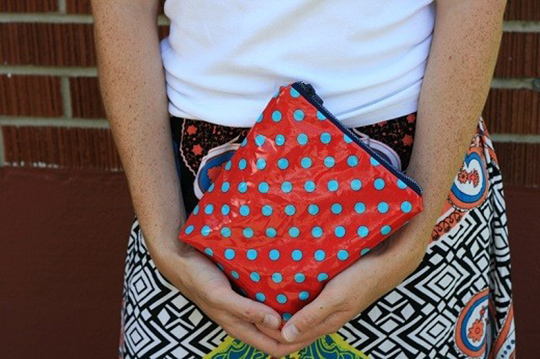
Happy Pouch finished measurements: 7 1/4" tall x 6 3/4" wide x 1 3/4" deep
Everyone loves a cute pouch that they can use for their cosmetics when they're on the go or just a sweet little something to carry in their bag for miscellaneous odds and ends. I like to carry my Happy Pouch as a small poolside clutch, too. It's perfect for housing your money, keys, license, phone, sunglasses, and maybe even a stick of sunscreen. When it's made out of oilcloth, it transitions easily from cosmetic pouch to clutch with just a simple wiping down! So, what are you waiting for? Grab a cup of coffee or a coke (I'll bring the brownies) and let's sew!
Supplies Needed:
-7" metal zipper
-oilcloth (or home decor fabric for the outside of the bag and quilting-weight cotton for the lining)
Necessaries: sewing machine, matching thread, scissors, pins, ruler, and marker
Cut It Out:
-4 pieces of oilcloth 7 3/4" x 9"
Putting it Together:
1. Pin zipper to outside bag piece, right sides together, and sew. Repeat with other outside bag piece with opposite side of zipper.
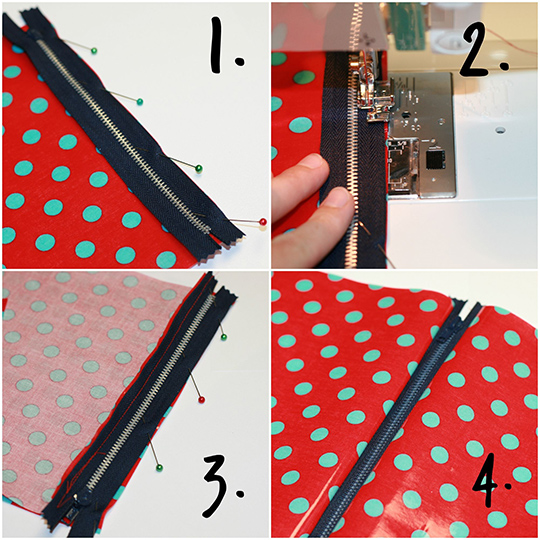
2. Sandwich zipper tape between lining and outside bag. Sew. Repeat with opposite side of zipper and remaining lining piece.
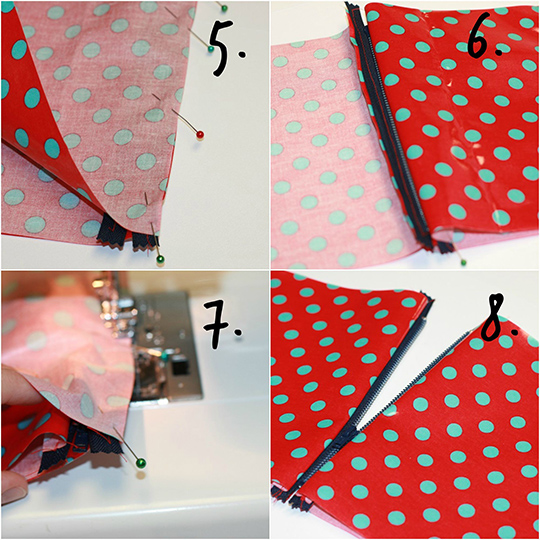
3. Open zipper almost all the way. Place right sides together respectively, pin around all edges, and sew at 1/4". Leave a small 3" gap at the base of your lining piece.
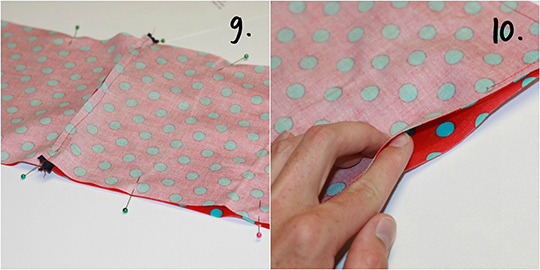
4. Make boxed corners at the base of your bag by simply matching the side seam to the bottom seam. Repeat with all four corners. Use a ruler and draw a straight 1 1/2" line (as seen in photo). Sew straight seam on line and trim off excess point.
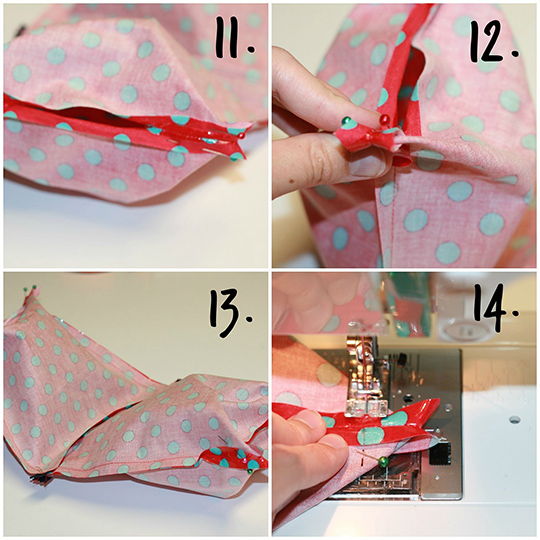
5. Pull outside and lining bag pieces through gap at the base of your lining. Continue until all of bag is right side out. Sew gap closed and push lining into outside bag.
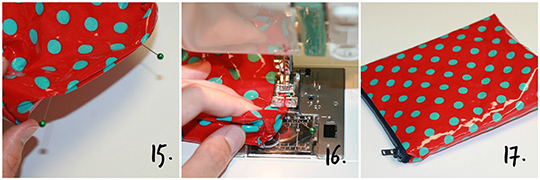
Your Happy Pouch is finished! Happy Day!

The Happy Pouch tutorial was written by Abigail A. Long, author of Modern Prairie Sewing: 20 Handmade Projects for You & Your Friends. Want to win a copy of her book? Enter our giveaway here: a Rafflecopter giveaway! Giveaway open to US residents only; giveaway runs until 9/8 12AM PST and winner will be announced the next day.
Congratulations to Cecilia Young, winner of the Modern Prairie Sewing giveaway! We hope you enjoy making Abi's fun and beautiful projects, and thank you so much to everyone else who entered as well!
Keep up with Abi as she blogs over at themodernprairiegirl.blogspot.com. Visit her Etsy shop, where she sells her book, Modern Prairie Sewing, PDF patterns of her own design, and handmade items! Like her Facebook page Modern Prairie Sewing.
