FREE PROJECT: Stretch’d Quilt
Mar 30th 2022
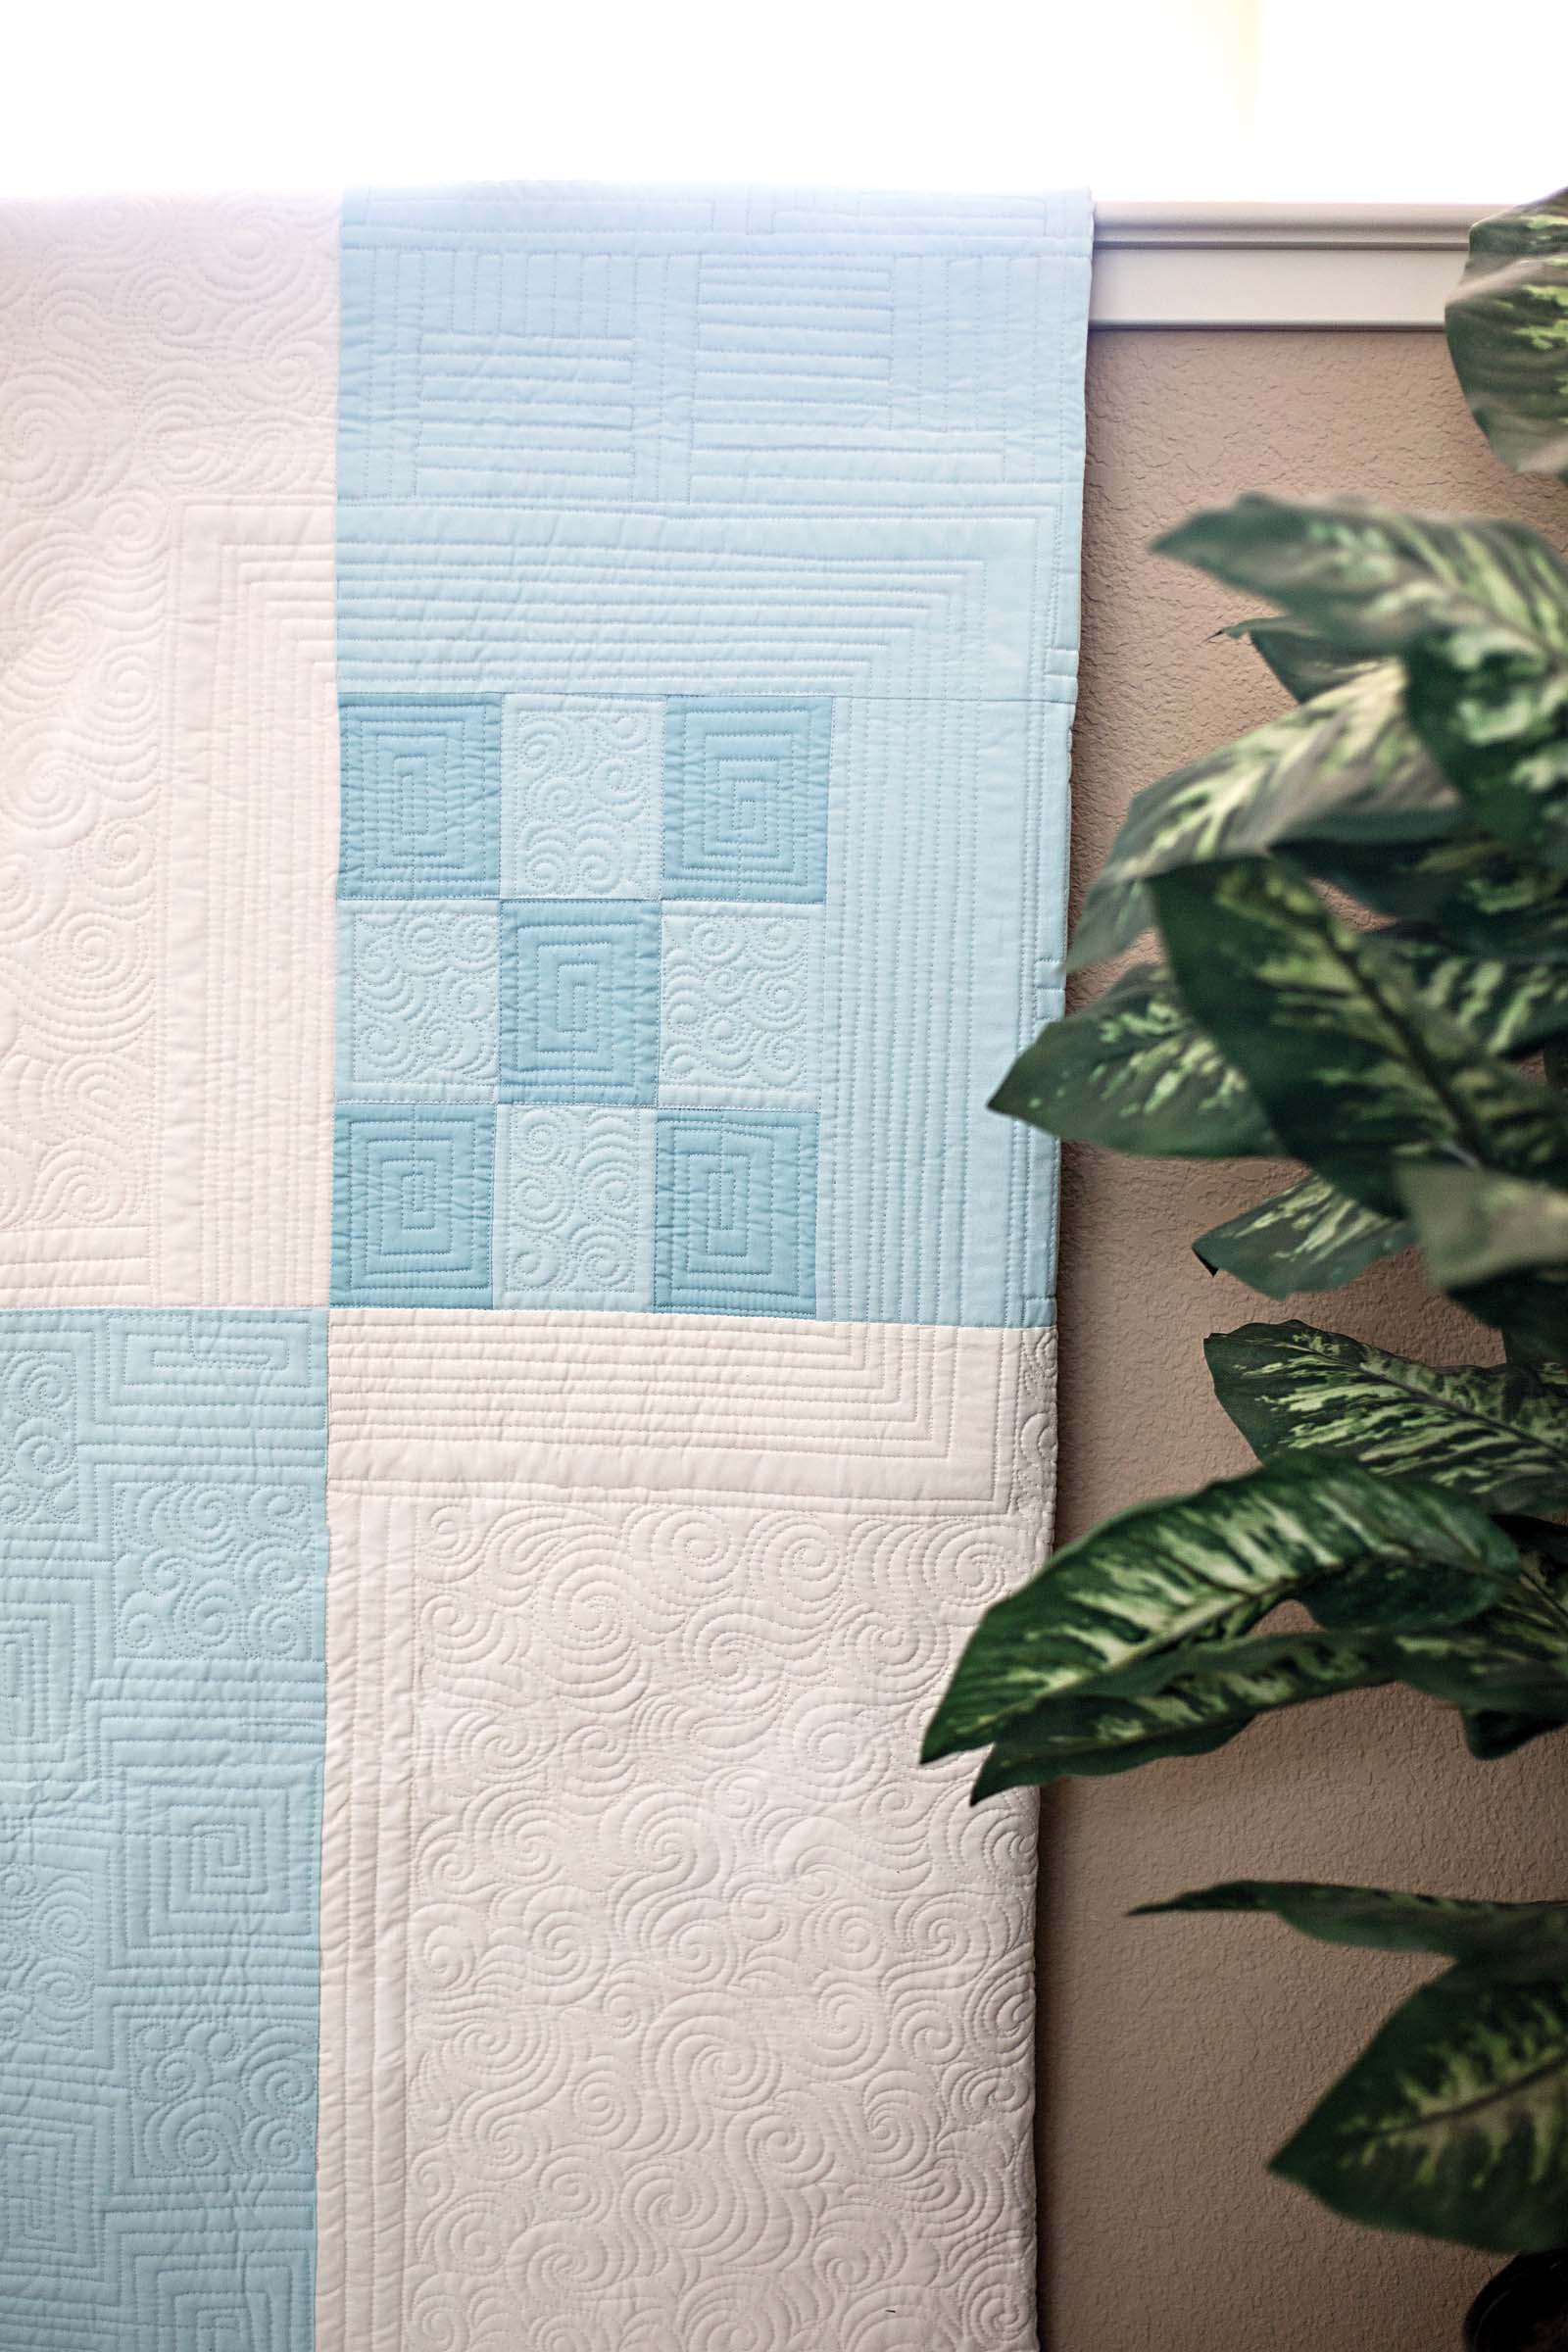
The large blocks make this the perfect quilt for those who enjoy the minimalist aesthetic. Build on your quilting skills with the Stretch’d Quilt project from Nine-Patch Revolution by Jenifer Dick and Angela Walters.
FINISHED QUILT: 75 ˝ × 90 ˝
FINISHED SMALL BLOCK: 8¼˝ × 10½˝
FINISHED LARGE BLOCK: 25˝ × 30 ˝
Design Notes
Any three colors will work great with this quilt. Just make sure the values in the small Nine-Patch are close together to keep it a subtle detail.
Fabrics
Yardage is based on 42˝ usable fabric width. WOF = width of fabric.
Light blue: 31/2 yards
Cream: 3 yards
Medium blue: 1 fat eighth
Binding: 5/8 yard cream or light blue
Backing: 51/2 yards
Batting: 81˝ × 96˝
Cutting
LIGHT BLUE
Cut 4 strips 251/2˝ × WOF;
subcut 4 rectangles 251/2˝ × 301/2˝.
Cut 1 strip 20˝ × WOF;
subcut 1 rectangle 251/2˝ × 20˝,
1 rectangle 11˝ × 171/4˝, and
4 rectangles 31/4˝ × 4˝.
CREAM
Cut 4 strips 251/2˝ × WOF;
subcut 4 rectangles 251/2˝ × 301/2˝.
MEDIUM BLUE
Cut 5 rectangles 31/4˝ × 4˝.
BINDING
Cut 9 strips 21/2˝ × WOF.
Blocks
Use a 1/4˝ seam allowance. Refer to Basic Construction (page 8) as needed.
NINE-PATCH BLOCKS
Using the 5 medium blue 31/4˝ × 4˝ rectangles and the 4 light blue 31/4˝ × 4˝ rectangles, make 1 Nine-Patch block.

8 3/4˝ × 11
CENTER RECTANGLE
Sew the Nine-Patch to the rectangle along the 11˝ side. Press toward the rectangle. Lay the Nine-Patch / rectangle unit right side up, Nine-Patch to the left. Sew the 251/2˝ × 20˝ rectangle to the top matching the 251/2˝ sides. The Nine-Patch should be on the bottom left of the block.
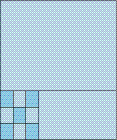
25 1/2˝ × 30 1/2˝
Assembly
Lay out the rectangles in 3 rows of 3, alternating the blue and cream. Sew them together in rows, and then join the rows.
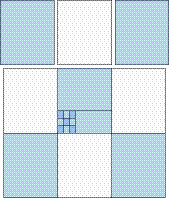
Quilt assembly
Finishing
Layer and baste the quilt.
QUILTING
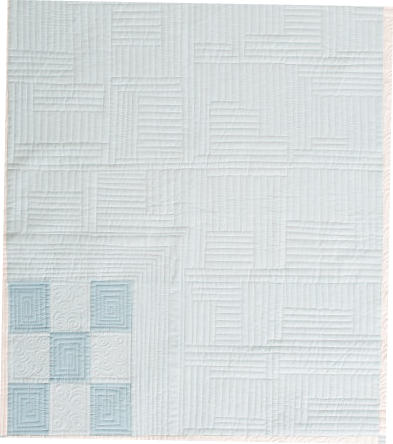
This huge Nine-Patch quilt with the baby version in the center is quick to put together, meaning you can get to the quilting even faster. Could anything be more fun than that? Let the big blocks be your guide, and try alternating designs in the blue and white fabrics.
The offset squares design is perfect for the larger areas in this quilt. It adds a nice consistency, while not overpowering the smaller block in the center. It’s quick to quilt and even has a fun secondary design within itself.
Alternating between echoed squares and the box with free-motion quilting results in a fun secondary design where the blocks create almost a diagonal line. If you want, however, you can quilt just one option for a nice allover design.
Offset Squares
While there are a lot of straight lines in this design, a walking foot or a ruler isn’t really necessary. All the straight lines are fairly short, meaning that you can freehand them and keep them somewhat straight.
STEP 1 Starting about 1/2˝ down from the upper corner, quilt a square spiral that echoes in on itself. Once you reach the center, quilt a line that extends to the right past the block. Try to make the line a little bit wider than the square itself. Fig. A
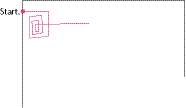
NOTE: Your squares can be as big or as little as you like, just try to keep them all the same size to help make the rows as even as possible.
STEP 2 Quilt a closed square by quilting a line up, to the right, down, to the left and back up to the starting point.
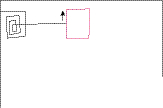
STEP 3 Fill in the closed square with a free-motion quilting design, such as a meander or swirl, working your way across to the other side of the box.
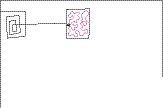
STEP 4 Quilt a line that extends from the box (make it a little longer than the width of the boxes) and quilt another echoed square. Repeat this process, quilting echoed squares, closed boxes, and spaces, until you reach the end of the area.
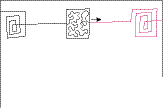
NOTE: You don’t have to end on a space, or even a particular square. Just go until you run out of room, even if it means that the last thing in the row is wider or narrower than the rest.
STEP 5 Travel up the side of the area 1/2˝ above the quilting. Fill in the space above the row by echoing the boxes and spaces until the area is filled in. Try to end on the right side of the area.
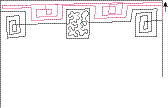
STEP 6 Quilt a line that echoes the first row about 1/2˝ away back to the left side of the area.
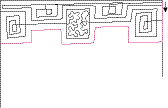
STEP 7 For the second row, quilt the same shapes, except where there is a box in the row above, quilt a space. Where there is a space, quilt a box or echoed square. Continue until you reach the right side of the area.
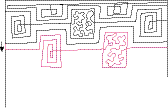
STEP 8 Travel down the edge about 1/2˝ and echo the row quilted in Step 7 back to the left side.
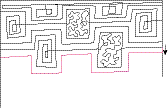
STEP 9 Continue quilting rows and echoing until the area is filled in.
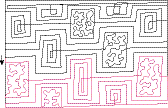
Small Nine-Patch
Even though the offset squares design doesn’t detract from other piecing, you might want to echo around the small Nine-Patch block a few times to help separate it from the rest of the quilting. This helps prevent it from getting swallowed up by the larger quilting areas.
THE LAST STEP
Add the binding to your quilt. Note that Stretch’d requires about 345˝ of binding.
Shop Nine-Patch Revolution by Jenifer Dick and Angela Walters
WANT MORE CREATIVE CONTENT? SIGN UP AND RECEIVE 30% OFF YOUR FIRST ORDER.


