Free Project: Round Bowl from Favorite Fabric Bowls, Boxes & Vases
Posted by Deirdre Quirk on May 16th 2017
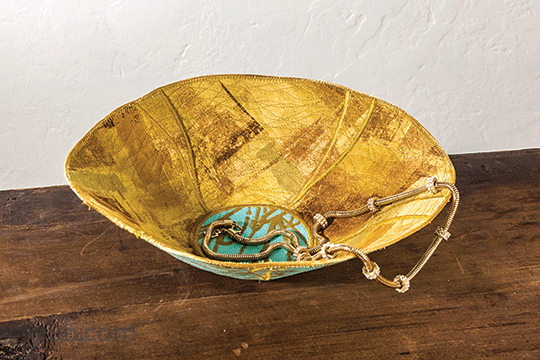
This wonderful project is great for a novice to learn satin stitching and machine quilting. Get ready—sharp-looking curves ahead!
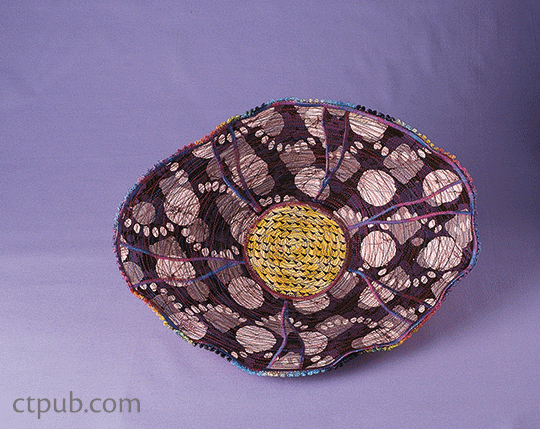
What You’ll Need
• 2 fat quarters of complementary fabrics
• 5˝ scraps for bases (optional)
• 1 yard of fusible web
• 1/2 yard of unwashed heavyweight canvas
• Thread to match or contrast with fabrics
• Round dinner plate
• Compass
• Basting spray
• Topstitch 90/16 needle
• Basic sewing supplies
LAYERING
1. Stack the materials by placing the fabrics right sides together and folding the canvas and fusible web so there are 2 layers. Pin the layers. Place the stack on your cutting mat.
2. Set a round plate, bottom up, on top of the stack. Holding it firmly, use it as a guide to draw a circle. Use a compass to extend the diameter, or draw the line freehand in pencil, 1˝–2˝ beyond the edge of the plate.
3. Rotary cut along the extended circle, adding a small outward notch somewhere along the edge so you can easily realign the layers.
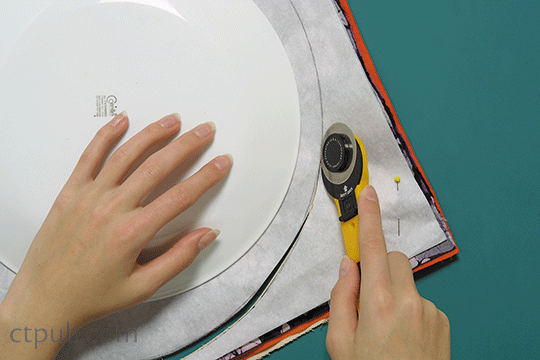
Rotary cut beyond the plate.

Cut a notch to help with realignment.
Tip: As you cut, slide the plate around to keep the layers flat.
4. Remove the pins and align the circles of fabric, fusible web, and canvas, using the notches as a guide. Fuse the web to the fabric, then the fabric to the canvas. Temporarily adhere the canvas layers together with basting spray.
ADDING THE BASES
1. Apply fusible web to the back of 2 fabric and 2 canvas 5˝ scraps.
2. Use a compass to draw a 4˝ circle on the paper backing of the fusible web on just 1 of the canvas pieces. Cut this circle out with scissors.
3. Cut out 1 fabric base, making it 1/16˝ larger all around than the canvas base.
4. Use a ruler to locate the center of the large textile sandwich. Fold the base into quarters, and lightly crease the point. Unfold, and insert a pin from the fabric side at the center point. Remove the paper backing, and insert the pin through the dot in the center of the textile sandwich. Keep the pin in place until you can smooth the canvas base out and press to fuse.
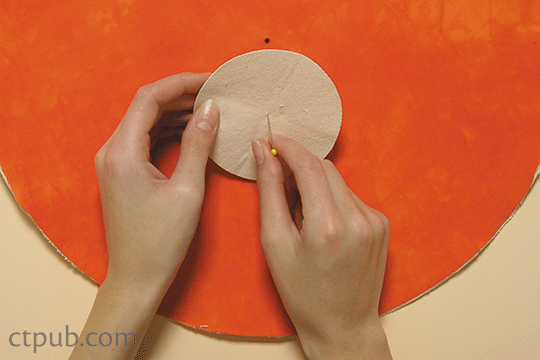
Center the canvas base on the textile sandwich.
5. Flip the textile sandwich. Peel the paper backing off the remaining 5˝ scrap of fusible-backed canvas. Use basting spray to temporarily adhere it in place, checking that it’s centered over the first base.
6. Using a slightly shortened stitch length, straight stitch around the first neatly cut base, keeping the stitches 1/16˝ to the inside of the edge. Turn the textile sandwich over and trim away excess canvas beyond the stitches. Pull up on the fabric as you are trimming to get a nice close trim. Press to fuse the second canvas base in place.
Tip: A pair of double-curved appliqué scissors helps you get as close as possible to the stitching and produces a nice, smooth edge.
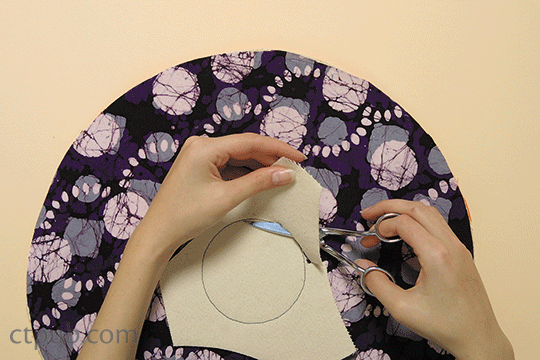
Trim the second canvas base after stitching.
7. Repeat Steps 2–6 to apply the fabric bases. Satin stitch around the edge of the base. Your stitches should cover the edge of the base on both sides of the bowl.
QUILTING
1. Quilt the base. This holds the layers together and makes the base more stable. Use a straight-stitch design or consider free-motion quilting. End with a few lock stitches at an edge or along previous stitches.
2. For the sides, set your machine to a slightly shorter straight stitch. Make lock stitches alongside the satin stitches around the base; then straight stitch in an ever-widening spiral toward the outer edge. Gently shift the textile sandwich back and forth as you sew to produce wavy stitching lines.
SHAPING
The steepness of your bowl’s sides will depend on the number of darts and how much you overlap each dart.
1. For your first round bowl, mark 6 darts by inserting 6 pins spaced fairly evenly around the base and/or the edges of the sandwich.
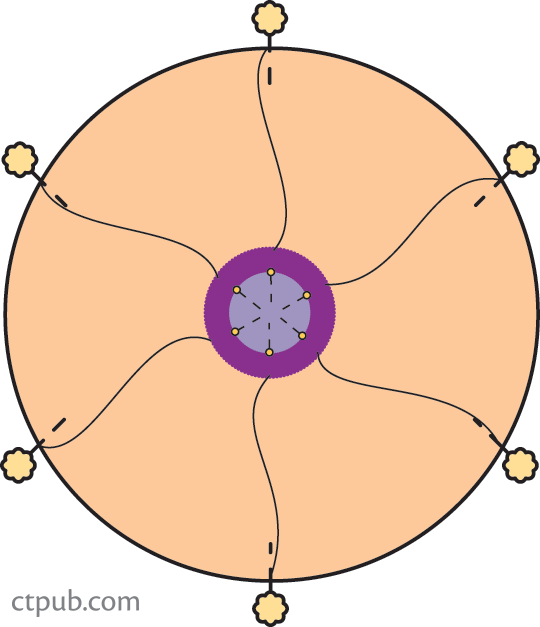
Note: Dart lines are imaginary only!
Tip: For an oval bowl, omit two opposite darts. Satin stitch fake darts for symmetry.
2. Using scissors, cut a gently curving line from 1 pin along the outer edge of your unshaped bowl to within about 1/4˝ of the base. Refer to the diagram, but cut only 1 curvy line. You’ll be creating an overlap for this dart, not removing it, and you’ll stitch along only 1 edge of the first dart before you cut the next dart.
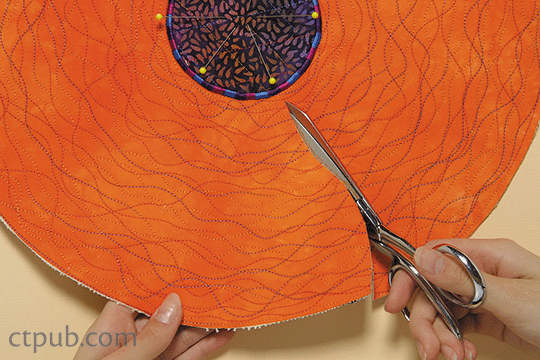
Cut the first dart; stop 1/4" from the base.
3. Set your sewing machine to a very open zigzag. Sew from the base toward the outer edge. Start sewing before the dart actually starts. (This eases the transition.) Sew along the dart, overlapping the cut edges slightly at the start, then increasingly to about 1˝ at the outer edge. You may need to hold the dart together close to where you are sewing. Keep the overlap smooth and the zigzag stitch centered over the cut edge of the fabric.
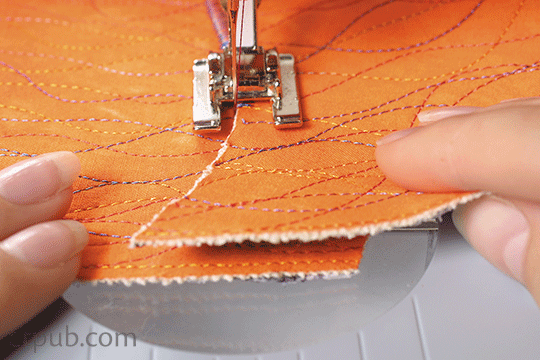
As you stitch, increase the overlap.
4. Repeat Steps 2 and 3 until you have cut and zigzag stitched 1 side of each dart. If you like the bowl shape, satin stitch over the zigzag. If you don’t, use a seam ripper to rip out the stitches of 1 or more darts and resew them.
5. Flip the bowl to the reverse side, and satin stitch along the other edge of the cut darts.
6. For a more finished look, satin stitch over all the darts a second time. Secure the beginning of each line of stitches with backstitches or lock stitches.
Tip: Use a narrower stitch when you begin each dart, and graduate to a wider stitch at the outer edge.
Tip: Want the lip to flare out a bit? As you approach the outer edge, gently pull the dart apart.
FINISHING
1. Using scissors, trim the outer edge of the bowl so none of the bare canvas is showing and the bowl edge has the shape you want.
2. Satin stitch around the rim twice. For a wavy rim, tug on the fabric as you stitch the edge. For the first round, use a medium-width stitch; for the second time around, use a slightly wider satin stitch.
3. End your stitching with a few lock stitches.


