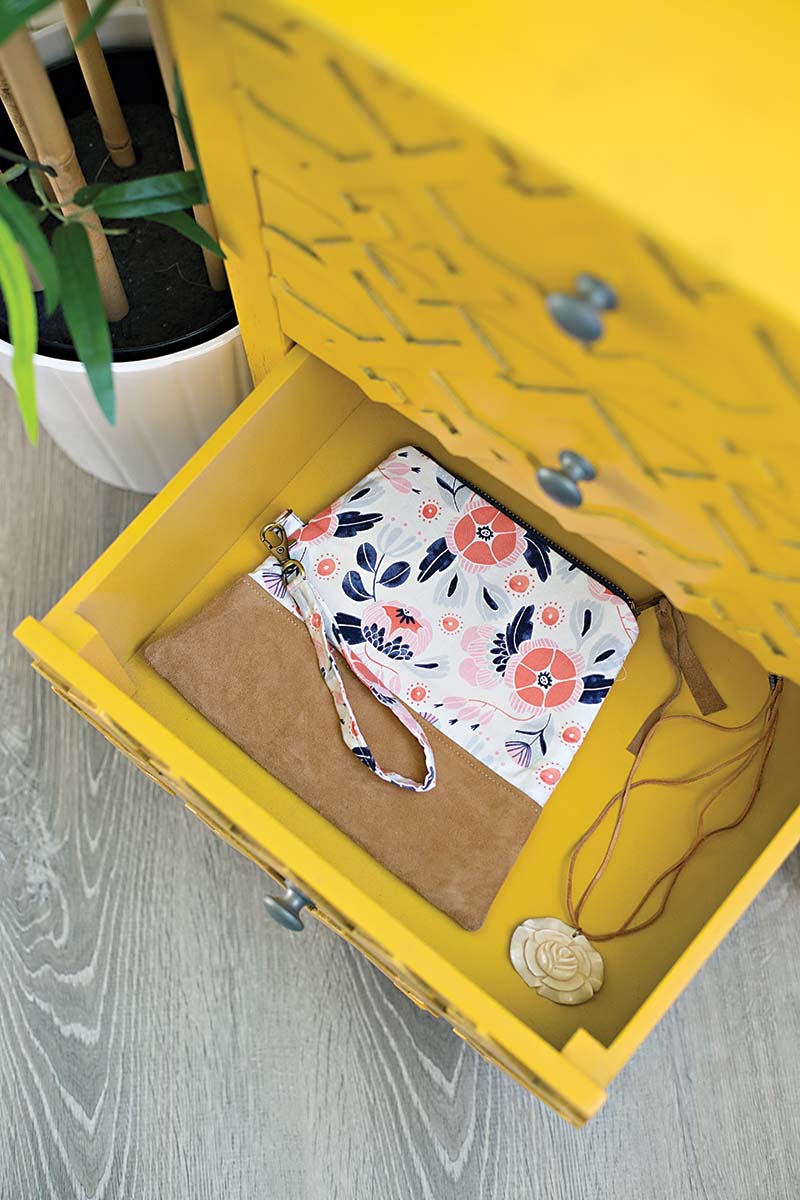
Free Project: Fold-Over Mini Clutch
Feb 16th 2022
Use your favorite fabrics to create this modern clutch! This project is from More Sewing to Sell—Take Your Handmade Business to the Next Level and is simple in construction and fun to wear.
Finished size: 8˝ x 10˝
Supplies
Makes 1 clutch.
FABRICS
- Cotton fabric: 1 fat quarter
- Denim or canvas: 1 fat quarter or 1 piece 18˝ x 22˝
- Leather, suede, or kraft-tex (by C&T Publishing): 1 piece 7˝ x 10˝
OTHER SUPPLIES
- Brass/jeans zipper: 7˝ long
- Swivel hook and D-ring: 1/2˝
- Craft or bulldog clips: To hold leather or kraft-tex together (Note: kraft-tex can’t be pinned.)
- Leather needle: For your sewing machine
- Leather and zipper feet: For your sewing machine
TIP: kraft-tex: Kraft Paper Fabric
C&T’s kraft-tex is a great substitute for leather — it’s less expensive, can be washed and dried, is easy to sew, comes in a variety of colors, and is vegan-friendly for those who want to avoid leather.
Cutting
COTTON
- 2 pieces 5˝ x 10˝ for exterior top
- 1 piece 2˝ x 14˝ for strap
- 1 piece 2˝ x 4˝ for strap loop
DENIM OR CANVAS
- 2 pieces 8˝ x 10˝ for lining
LEATHER, SUEDE, OR KRAFT-TEX
- 2 pieces 31/2˝ x 10˝
Construction
Seam allowances are 1/4˝ unless otherwise noted.
MAKE THE EXTERIOR
1. Change the needle on your machine to the leather needle.
2. Sew the 5˝ x 10˝ fabric and 31/2˝ x 10˝ leather right sides together. Use clips instead of pins to hold the pieces together. Using a pressing cloth and working on the fabric side, press the seam toward the leather.
3. Topstitch on the leather side 1∕8˝ from the seam.
4. Repeat with the other exterior side.
5. Place the exterior in front of you on your worktable with the fabric side facing up. Measure in 11/2˝ from the side on the top edge. Mark and use a ruler to cut a diagonal line down to the base. Repeat with the other side.
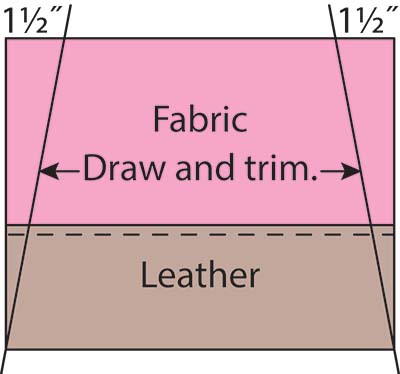
Shape the exterior sides.
6. Cut the same diagonal lines on the other exterior piece.
ADD THE D-RING TO THE SIDE
1. Press the 2˝ 4˝ piece of cotton fabric in half, wrong sides together, to make it 4˝ x 1˝.
2. Open up the pressed fabric and press the raw edges in toward the center fold. Fold it in half again so that the piece measures 1/2˝ x 4˝.
3. Topstitch both 4˝ edges.
4. Thread the D-ring to the center of the fabric strap. Fold in half with the D-ring in the center. Use the zipper foot to sew across the strap close to the D-ring.
5. Measure 4˝ up from the base of one exterior. Baste the D-ring strap in place facing in toward the center of the piece and parallel to the seamline below. Because the side of the exterior piece has been cut at an angle, the raw edge of the strap will hang over the edge of the exterior piece at the top; you can trim it to follow the slant.
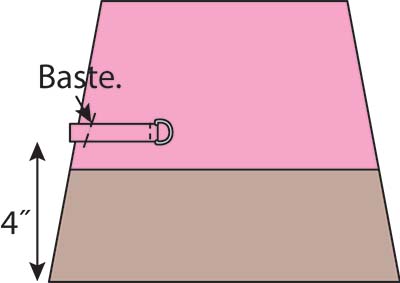
Baste the D-ring on one of the exterior pieces.
ADD THE ZIPPER
1. Center and pin the zipper right sides together with one top exterior piece. Sew them together using a zipper foot.
2. Pin and sew the other side of the zipper to the top of the other exterior piece.
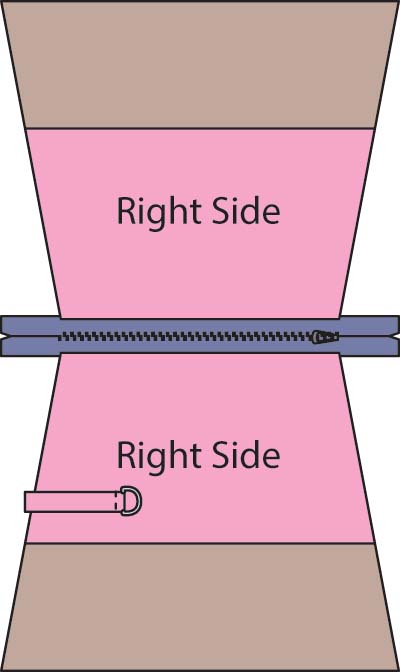
Sew the zipper centered between the 2 exterior pieces.
MAKE THE LINING
1. Cut the 8˝ x 10˝ lining pieces with the same diagonal as the exterior pieces.
2. Sew the right side of the lining pieces to the wrong side of the zipper sides, using the previous seamline as a guide.
3. Repeat with other lining side and other zipper side.
4. Pull the lining pieces away from the exterior pieces and pin the corners right sides together. Pin the sides and bottom of the lining together as well.
5. Pull the exterior sides together and use a clip to hold the bottom corners right sides together. Clip the side and bottom right sides together also. Pin the zipper seam toward the exterior.
6. Starting at the base of the lining, about 3˝ from the side edge, sew toward the edge and then up the side, over the zipper seam, down the side of the exterior, and all the way around to about 3˝ from the other side of the lining base. This will leave a 4˝ gap in the base of the lining side.
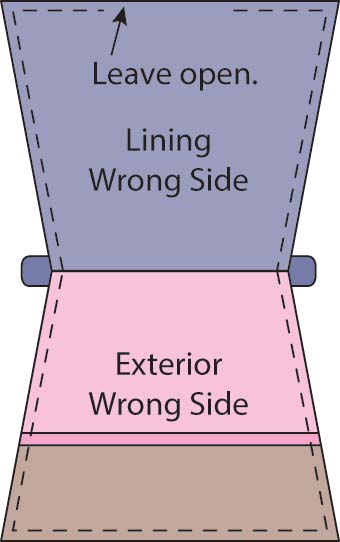
Sew around the perimeter of both the lining and exterior.
FINISH THE CLUTCH
1. Turn the piece right side out through the opening in the lining. Check your seams and then press the opening in the lining under toward the wrong side to match the seams.
2. Sew the opening closed with a ladder stitch or topstitch it closed 1∕8˝ from the edge.
3. Press carefully and use a pressing cloth over the leather.
MAKE THE WRIST STRAP
1. Press the 2˝ x 14˝ piece of cotton in half, wrong sides together, to make it 1˝ x 14˝. Open and press the raw edges in toward the center fold. Fold the piece back together by the center fold so the folded piece is 1/2˝ x 14˝. Do not stitch this yet.
2. Thread the swivel clip to the center of the folded piece.
3. Open the just the ends of the folded piece a few inches. Then, without twisting the piece, sew the ends right sides together.
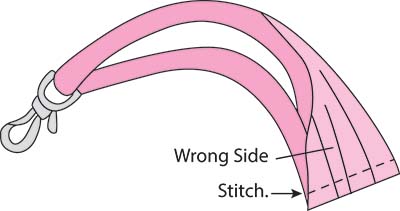
Sew the ends of the strap together.
4. Finger-press the seam open and then fold the edges back together. Press the piece again so the seam is flat.
5. Topstitch both edges of the strap loop, moving the swivel hook out of the way as you sew around.
6. Topstitch both sides of the strap together 1/2˝ above the hook to hold it in place. Use a zipper foot if needed to get close to the swivel hook hardware.
Shop More Sewing to Sell—Take Your Handmade Business to the Next Level


