

Creativity Unleashed: Designing a Quilt on the Computer
Posted by Jennifer Rapacki on Oct 18th 2024
Increase your quilting creative potential! With computer software like Electric Quilt 8, you can take your design process to a new level. All aspects of designing a quilt can be easily achieved once you take the time to learn how to use the software. Think of quilt design software as just another technique to learn. You will wonder why you haven’t taken the time before.
I’m going to take you on my journey designing a quilt and how the computer software fits into the overall design process. As with many of you, my quilts start with an idea or are inspired by something I have seen. I had an opportunity to participate in a weekend quilt retreat and it was the perfect time to finally think about the new quilt I wanted to make for my bedroom. My color inspiration was my curtain fabric using 4 colors: gold, burgundy, green, and blue.

For the design of the quilt, the inspiration was a layout I had seen on a magazine cover using half-square triangle blocks, where the coloring gave the impression of diamonds on the diagonal. The first step was to determine the amount of fabric needed by using Electric Quilt (EQ) to create a preliminary design in solid colors from my 4 chosen color families. EQ provided the fabric yardage for each color so I could easily determine the total amount of fabric I would need. When calculating the fabric, I added ½ yard of additional fabric for each color family, and for the background (focus) fabric and borders. This would allow for shrinkage when prewashing the fabric and some margin for “error” so to speak, in cutting.
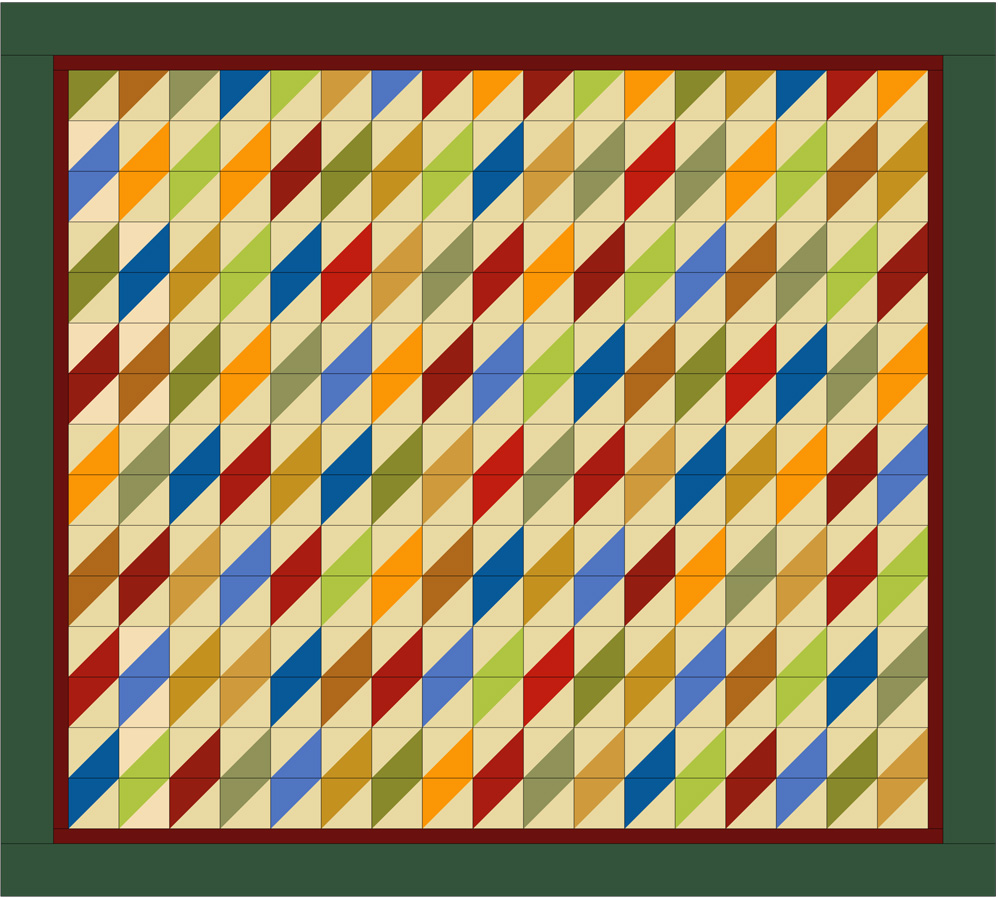
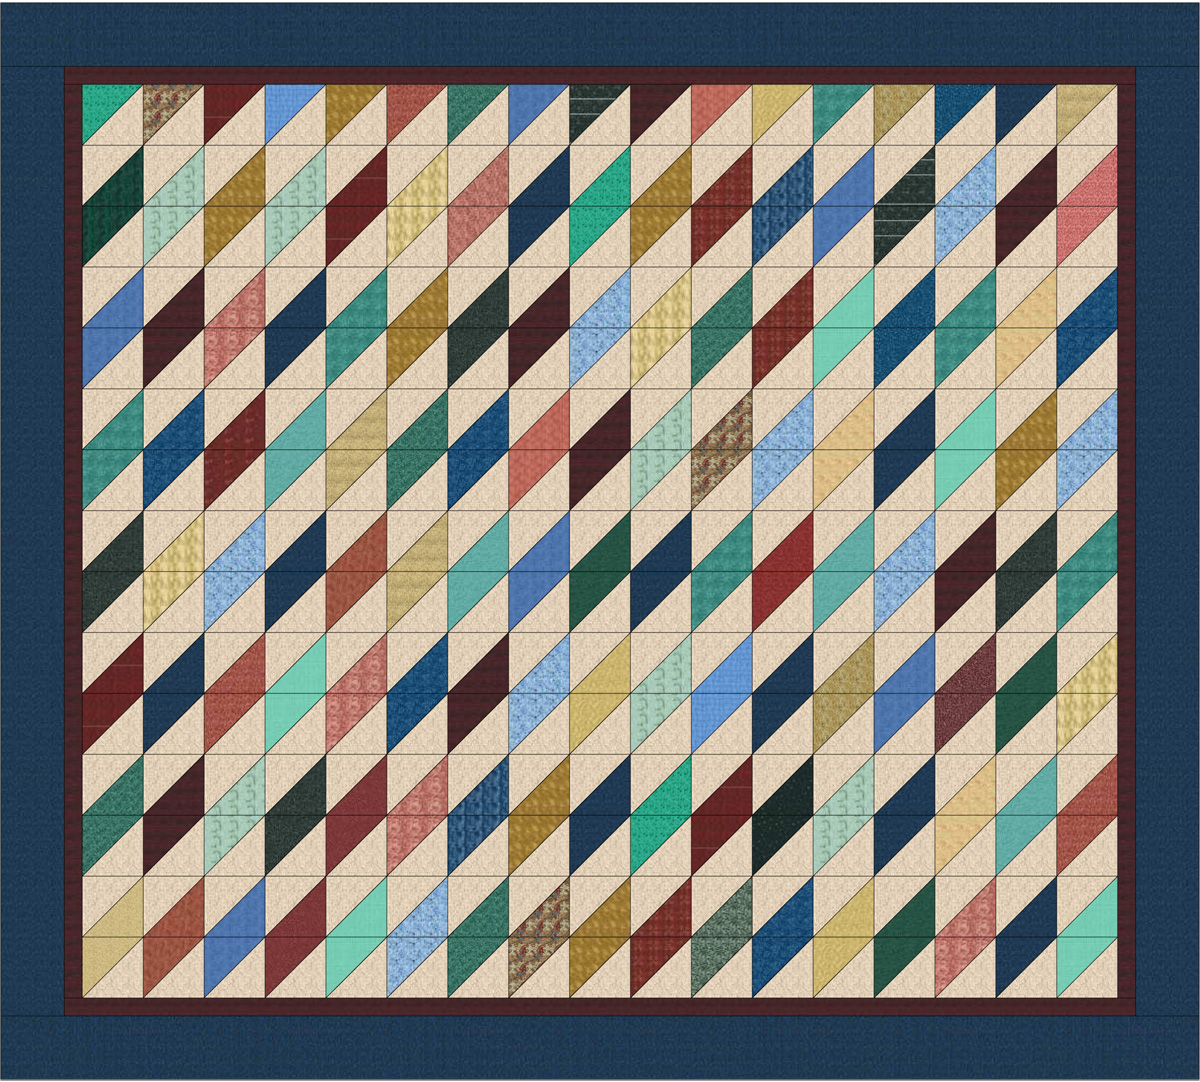
Once all the fabric for the quilt was collected, I sat down at my computer and scanned each piece of fabric into a jpg file. A simple shortcut to this step is to write down the fabric information from the end of the bolt when you purchase the fabric Then you can usually find jpg files on the manufacturer’s website that can be copied and downloaded to your computer. Or if you purchase online, download the photo before you add the fabric to the shopping cart. The next step was to import the fabric files into EQ and update the preliminary design layout by “painting” the design with my actual fabrics. The quilt as designed would be about 106” x 118” utilizing 6” blocks with an inner border of 1 1/2” and an outer border of 4 1/2”.
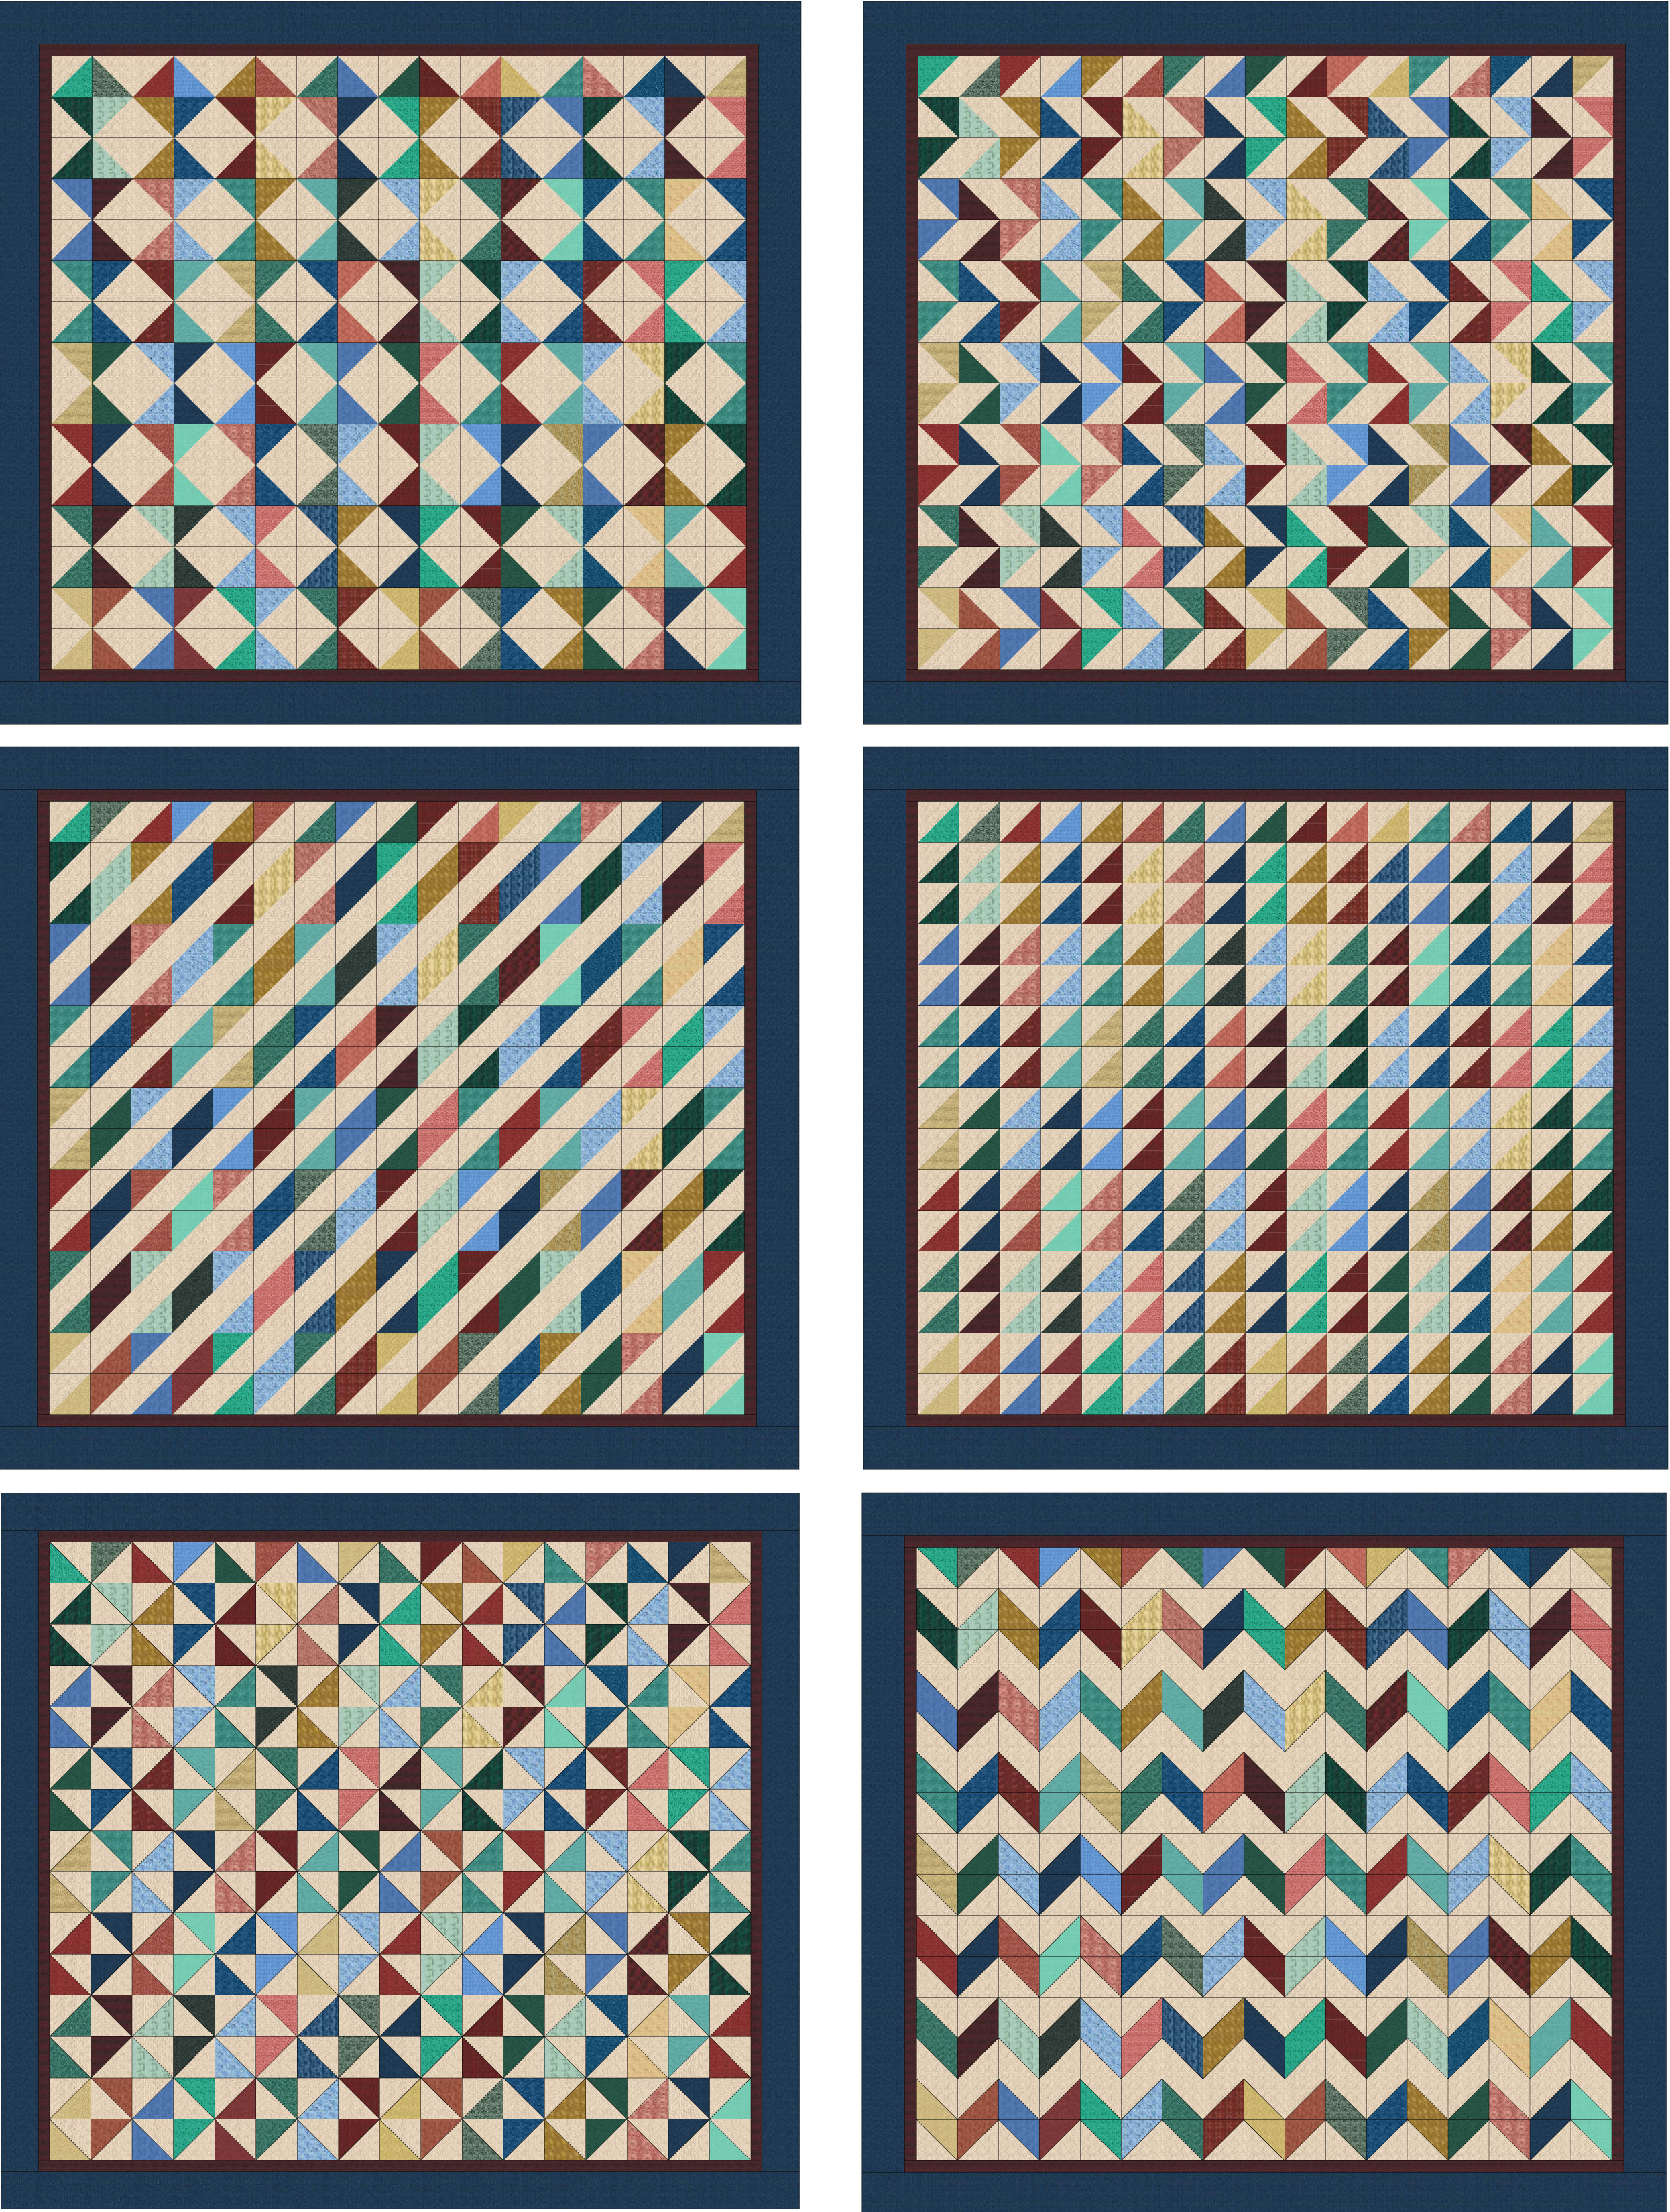
Now is the time to let your imagination run wild. The great feature of designing on the computer is the ability to “play” with the layout before ever cutting the fabric. EQ has a symmetry tool that automatically rotates the blocks 17 times. Utilizing this tool, many more design variations were possible for consideration.
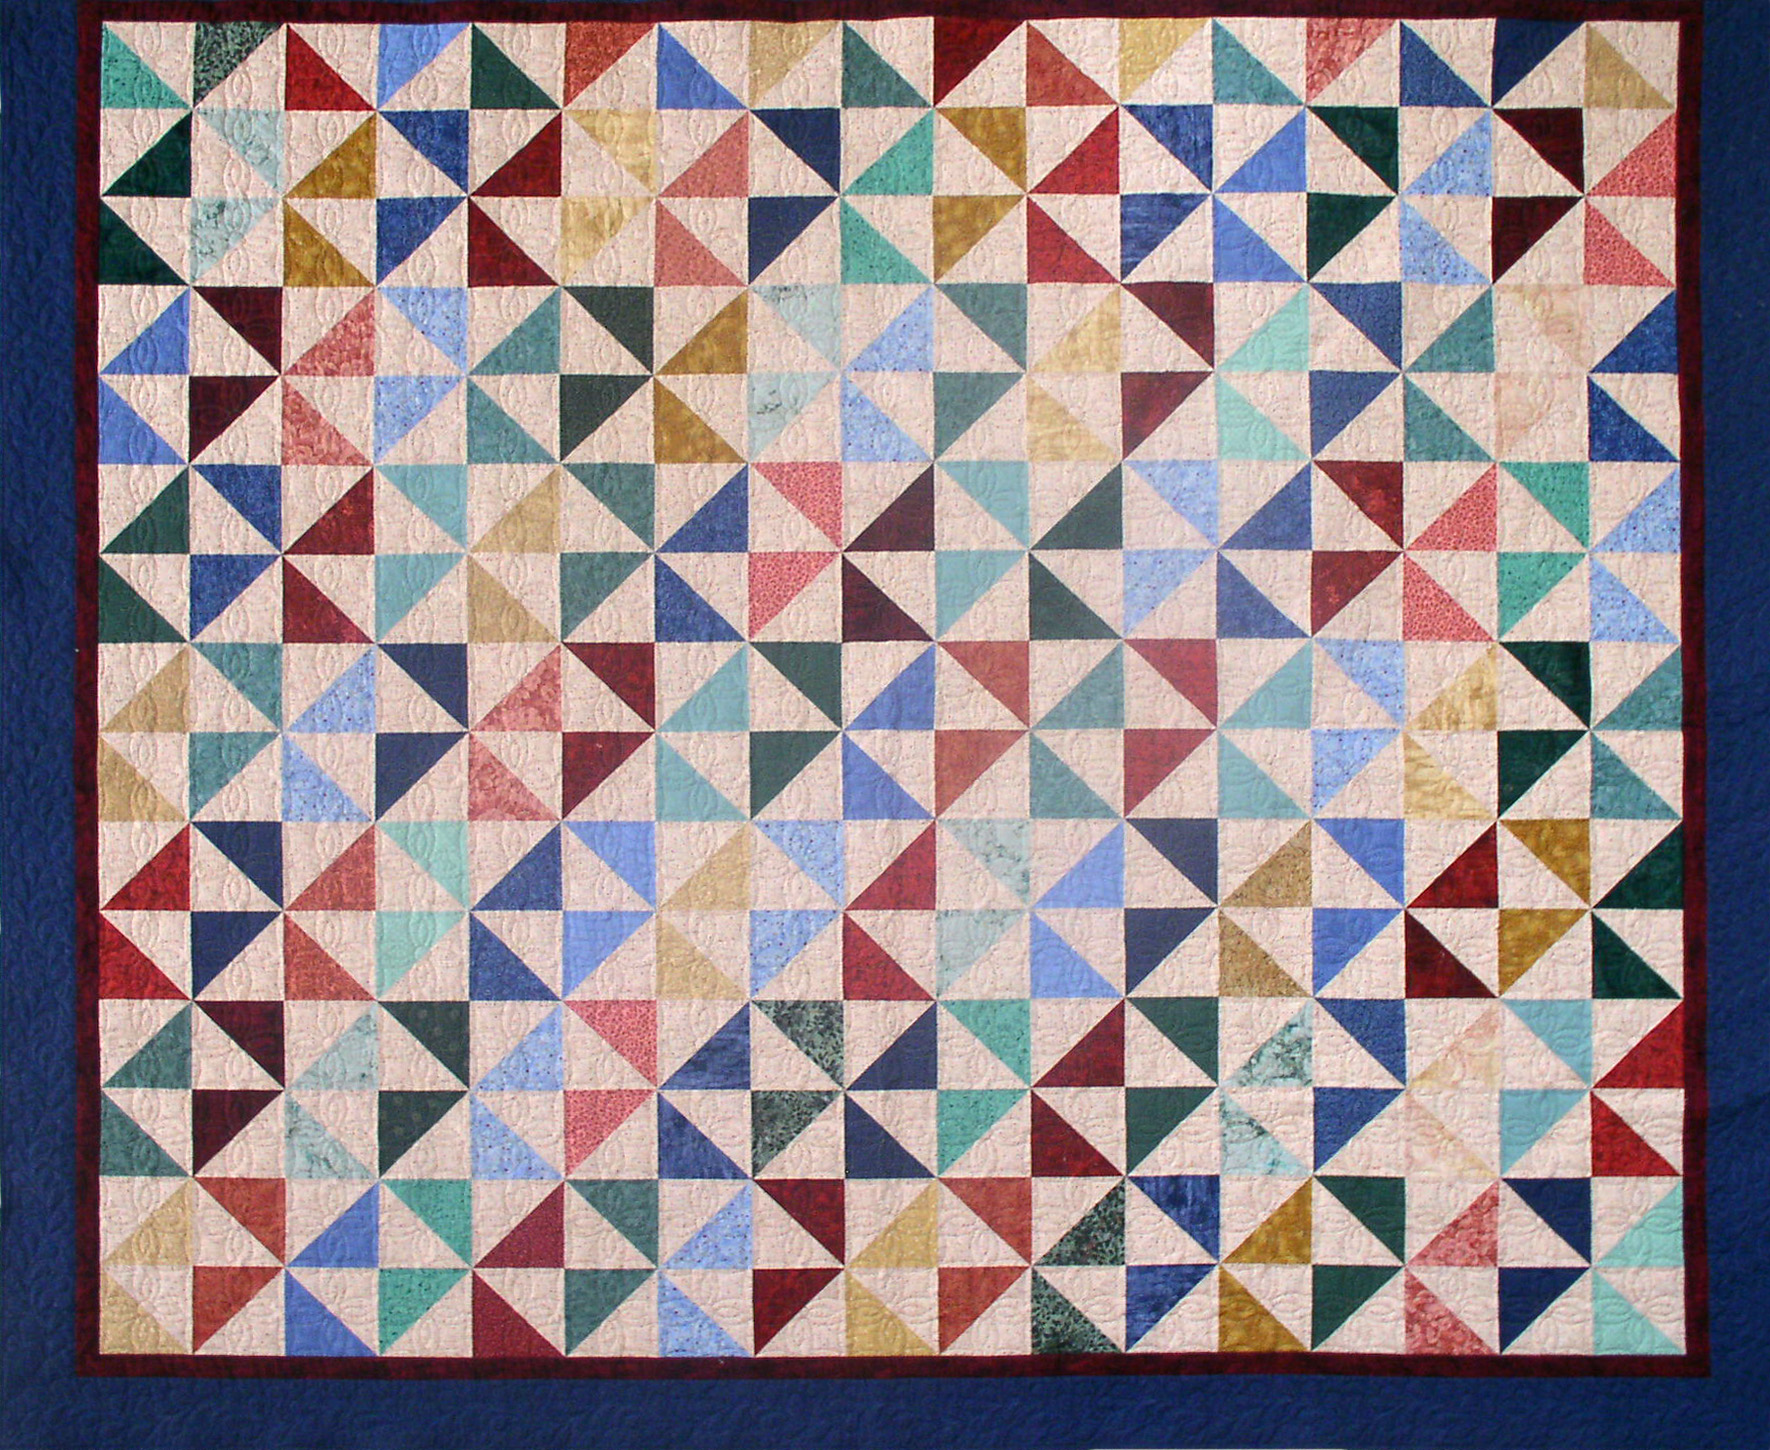
The two layouts I liked best were the pinwheel and the chevron shown in the third row. After printing these two layouts on 8 ½” x 11” paper, I chose to use the chevron layout, lower right.
All of this preparation was completed prior to heading off to my retreat, which left me with the cutting and sewing of the half-square triangles for the weekend. After getting four rows of the chevron pattern sewn, I placed the partially finished top on my bed and went, “Hmmm”. I realized that what looked great on a piece of paper wasn’t working out as well in the actual size of my quilt.
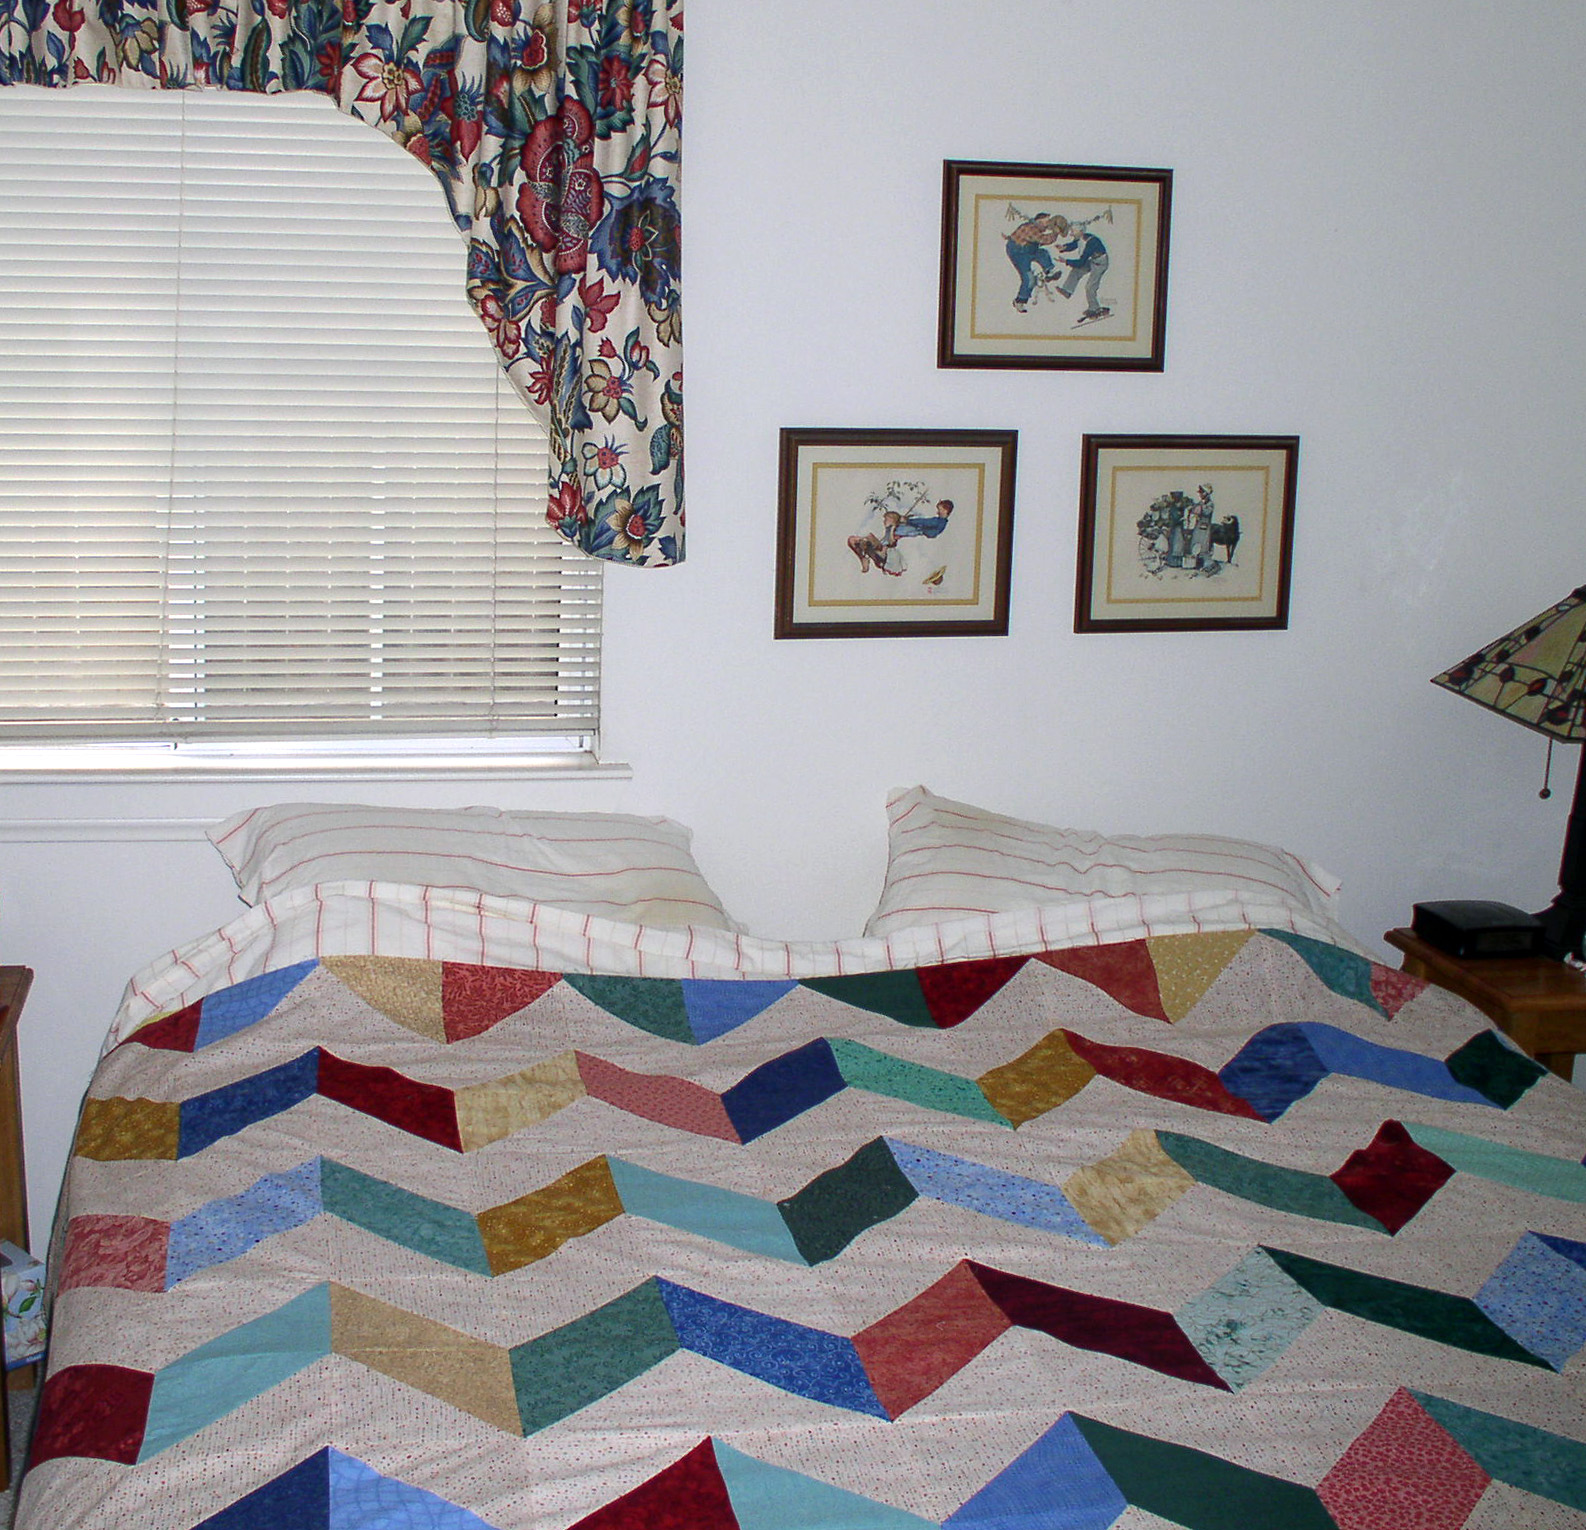
What I hadn’t considered was the scaling factor between the paper and the actual quilt size. In the chevron pattern, two triangles of the beige background fabric meet to form the zigzag pattern. This created a large space of light-value fabric in a king-size quilt. The layout looked really good to me on a piece of paper, but I didn’t like the effect on my bed with the white walls in the room and the curtain fabric. I stood in the doorway considering if there was any way to “fix” this layout, but nothing came to mind.
I knew I wasn’t going to be happy with the chevron layout, and at this point realized that the pinwheel layout I thought was too “busy” would work well in the actual size of my quilt in this room. Thank goodness I hadn’t sewn the whole top! To speed up the process of taking apart the quilt top, I determined the quilt blocks could be trimmed to 5 1/2” since the size I really wanted for my bed was around 90” x 106”. After about five nights of sitting in front of the TV with my seam ripper, I had the top apart so that I could trim the blocks.
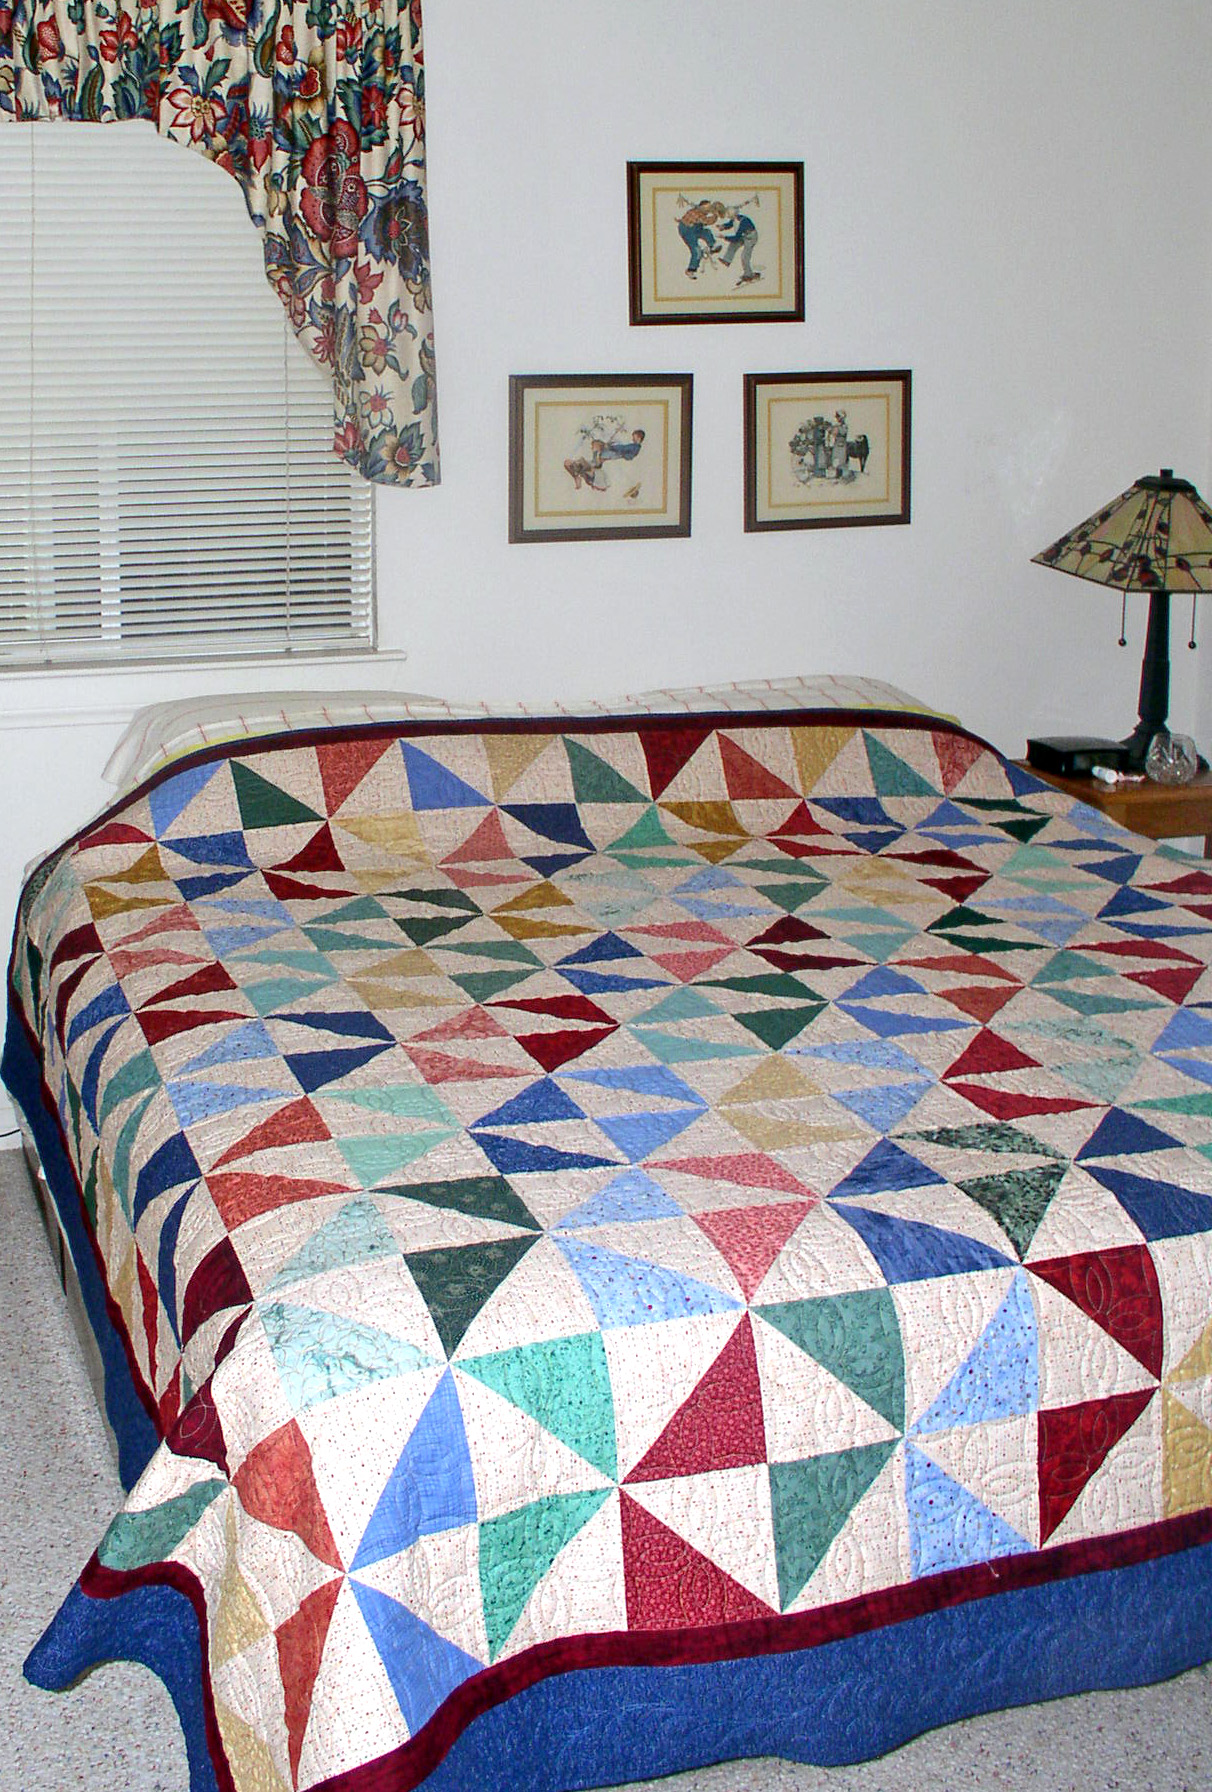
The pinwheel layout uses all the same blocks as the chevron layout, so with my printout as a guide, I put the quilt top back together. Because of the way I wanted to use the quilt on the bed, I didn’t add the second border across the top of the quilt. A local long-arm quilter did the quilting for me I was quite happy with the result.
And even happier with the quilt on my bed.
Quilt design software is not foolproof, as basic design principles still apply. My scale of design issue is not unique to designing on a computer and is just as applicable to someone designing on paper with colored pencils. The computer just let me generate more layout options quickly and easily. Moreover, the chevron layout could have worked just fine in a different room or for another use. As a personal preference, I felt the pinwheel layout worked better in my bedroom.
When I lecture to quilt guilds, I’ve been asked about the amount of time it takes to design a quilt on the computer. My answer is that I am spending all my “design wall” time on the front end of the process. When I am done with the computer work, I’ve got my sewing guide printed out on paper. Plus working on the computer lets you view the design in a more realistic fashion than using colored pencils.
This completed king-size quilt is something I would never have considered or pursued without the use of Electric Quilt, especially since I didn’t have a design wall large enough for all the blocks to have determined the final layout. Electric Quilt can unleash your creative spirit. While computers can be intimidating to many, if you like to design your own quilts or see how a design will work with other fabric choices, learning Electric Quilt can be well worth the time.
Check out my new Creative Spark class: Electric Quilt Software Basics
...
Jennifer Rapacki's journey into the world of technology began amidst the dawn of the PC revolution, where her innate talent for swiftly grasping new computer software and concepts paved the way for a rich and diverse career in Computer Information Systems. With a keen aptitude for navigating MAC, UNIX, and Windows systems, Jennifer's expertise spans both software and hardware domains. Graduating from Purdue University in 1979 with a Bachelor's degree in Mechanical Engineering, she later expanded her academic horizons with an MBA from the University of Phoenix in 1985.
Check out Jennifer's other Creative Spark courses:


