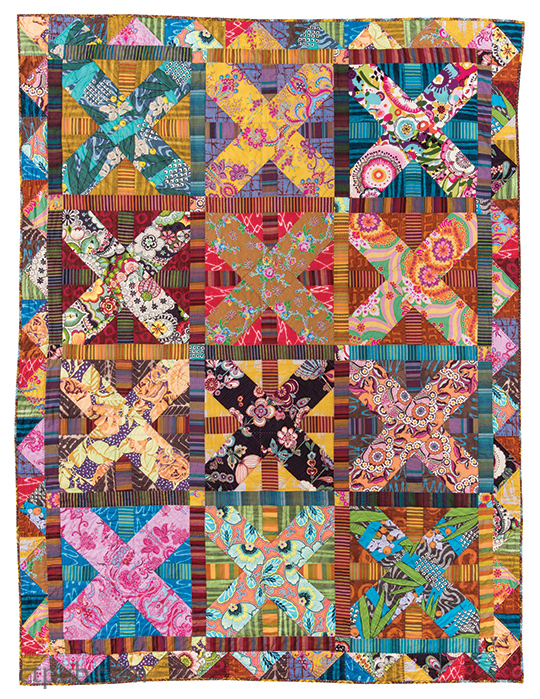
Color Works Quilt from Mixing Quilt Elements
Posted by Deirdre Quirk on May 8th 2017
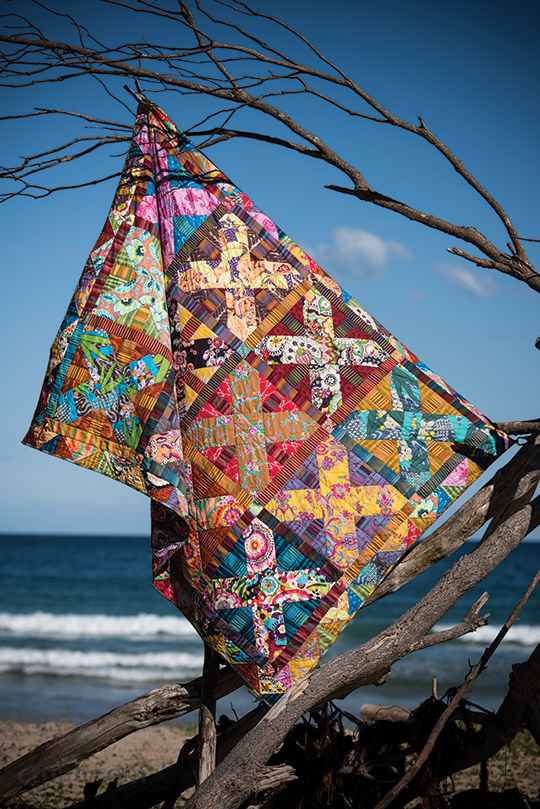
FINISHED QUILT: 65 1/2˝ × 84˝ (166 cm × 216 cm) FINISHED BLOCK: 16 1/2˝ × 16 1/2˝ (42 cm × 42 cm)
Color makes us happy. Contemporary fabrics today are full of exciting color. To make it work, balance bright, saturated colors with earthy, more tonal fabrics. Color Works is an opportunity to combine all those vivacious,big-print fabrics in your stash with shot cotton stripes as you might see them in a natural surround. Light and shade add interest, so remember that every garden has brown!
Here is an exercise using vibrant polychromatic prints that can be added to your stash of batiks or hand-dyed fabrics! The thing that brings them together is that they are beautiful, bombastic hits of print and color balanced by the contrast of the shadowy, earthy colors as if we are seeing them in the real world.
The border of this quilt is a thrifty use of the leftovers from cutting the quilt.
CHOOSING FABRICS
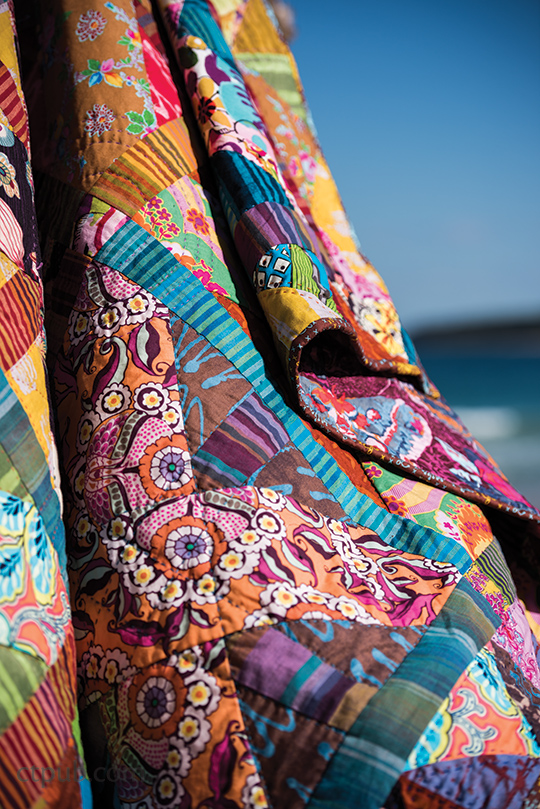
Blocks: Select a variety of polychromatic prints and mix them with monochromatic hand dyes or batiks. The ones I used are by Marcia Derse.
Sashing: The sashing strips are shot cotton stripes by Kaffe Fassett, which have lots of color shot through with the same earthy look to perfectly complement the loud feature prints.
Border: The border is simply a combination of the scraps, which further consolidate the palette with additional pattern.
MATERIALS
Yardage is based on 42˝-wide (107cm) fabric.
- Feature prints: 7/8 yard (80cm) each of 12 fabrics for large X, cornerstones, and outer border
- Stripes: 1/4 yard (25cm) each of 12 fabrics for thin crosses, sashings, and inner border
- Monochromatic prints, hand dyes, or batiks: 1/2 yard (50cm) each of 12 fabrics for block background triangles and border
- Binding: 5/8 yard (60cm)
- Backing: 5 1/4 yards (4.8m)
- Batting: 74˝ × 92˝ (188 cm × 234 cm)
- Optional: 45°/90° triangle ruler
CUTTING
All measurements include the seam allowance.
Each of 12 feature prints:
Cut 2 strips 5 1/2˝ × width of the fabric; subcut 1 strip 5 1/2˝ × 25˝ and 2 strips 5 1/2˝ × 10 1/2˝.
Cut 1 square 8 3/4˝ × 8 3/4˝; subcut diagonally twice to yield 4 quarter-square triangles (48 total for all 12 prints). You will need 36 of these for outer border. Save the rest for another project.
Cut 2 squares 2 1/2˝ × 2 1/2˝ for sashing cornerstones. You will have extra cornerstones.
Each of 2 feature prints:
Cut 1 square 41/2˝ × 41/2˝; subcut diagonally once to yield 2 triangles each (4 total) for ends of side borders.
Each of 12 stripe fabrics:
Cut 1 strip 2 1/2˝ × width of fabric from each; subcut 1 strip 2 1/2˝ × 22˝ for pieced blocks and 1 strip 2 1/2˝ × 17˝ for sashing.
Cut 1 strip 2 1/2˝ × width of fabric; subcut 2 strips 2 1/2˝ × 17˝ for sashing. You will have extra sashing pieces.
Each of 12 monochromatic prints,hand dyes, or batiks:
Cut 2 strips 5 1/2˝ × width of fabric from each; subcut 1 strip 5 1/2˝ × 22˝ for background of each block (total of 24 strips).
Binding fabric:
Cut 8 strips 2 1/2˝ × width of fabric.
SEWING
All seam allowances are 1/4˝, unless otherwise noted.
Blocks
1. Join a matching monochromatic print 5 1/2˝ × 22˝ strip to each side of a striped 2 1/2˝ × 22˝strip. Then cut the strip set into 4 rectangles 5 1/2˝ × 12 1/2˝.
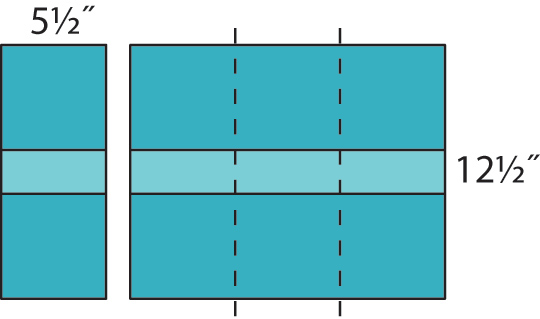
Subcut the strip set into 4 rectangles.
2. Prepare a template from the Color Works pattern (download here). Using the template or a quarter-square triangle ruler, cut a large triangle from each pieced rectangle as shown. The 96 smaller sections you cutaway will be used in the border later, so save them.

Use the template to cut the large triangle, saving smaller sections.
3. Sew a pieced triangle unit from Step 2 to each side of a 5 1/2˝ × 10 1/2˝ feature strip as shown. Lightly press. Repeat with the other 2 matching triangle units and 10 1/2˝ feature strip.
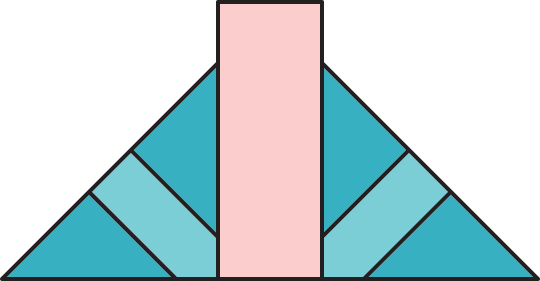
Join a triangle unit to each side of a 10 1/2" feature strip.
4. Marking the centers of each triangle and the center of the matching 5 1/2˝ × 25˝ feature strip, pin the centers together and sew a unit from Step 3 to each side of the strip.
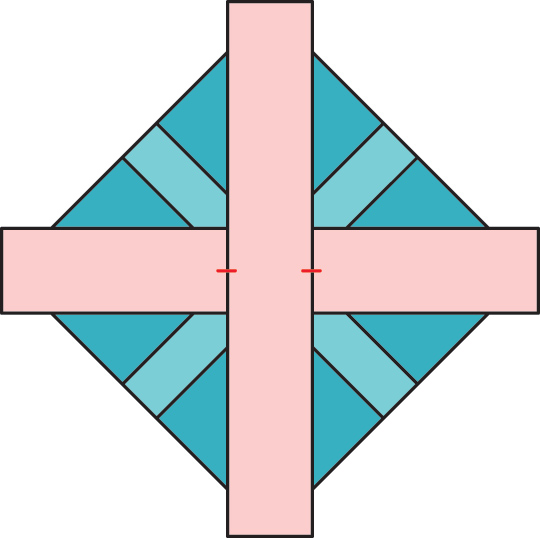
Sew the unit from Step 3 to each side of the 25" feature strip.
5. To complete the block, trim as needed to square up the block to 17˝ × 17˝. Use a ruler to trim the corners of the block to neat 90° angles as shown.
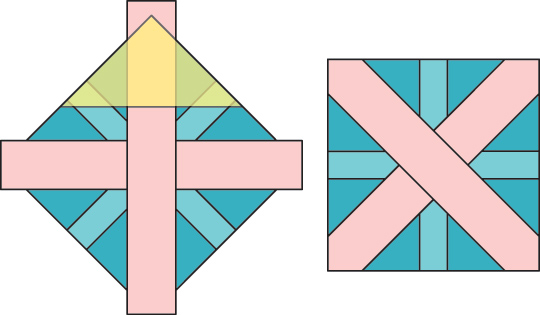
Square up the corners of the block.
6. Repeat Steps 1–5 to make 11 more blocks.
Quilt Body Assembly
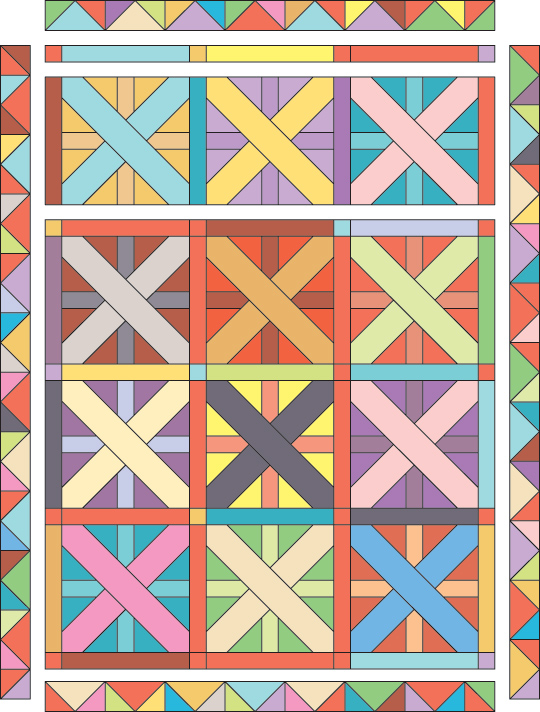
1. Refer to the quilt assembly diagram to arrange the blocks in 4 rows of 3 blocks each.
2. Position the striped sashing strips vertically between the blocks and at the left and right end of each row. Join each row together.
3. Position the sashing strips and cornerstones in place to form the sashing strip rows. Join together.
4. Matching the seams, join the sashing strips and block rows to complete the quilt body.
Borders
1. Refer to the quilt assembly diagram to arrange the outside border rows. Begin each border row with a feature half-square triangle that was cut from the 4 1/2˝ × 4 1/2˝ square and add the 36 feature quarter-square triangles that were cut from the 8 3/4˝ squares around the outside of the quilt, with the long side of the triangle next to the quilt body.
2. Trim 4 1/2˝ half-square triangles from the leftover sections as shown. You should have 96 half-square triangles.
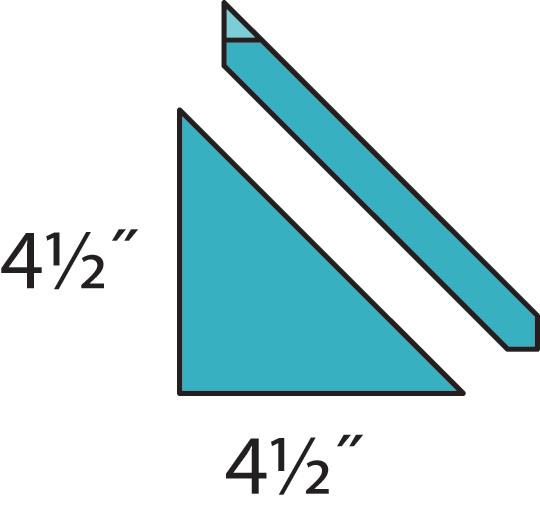
3. Sew the 96 half-square triangles from Step 2 together in pairs.

Make 48.
4. Arrange the units from Step 3 between the feature triangles to fill in the border with the long edge of each pair toward the outside. Stand back and make sure you are happy with how the colors and tones are spread around the border. You will have extras to save for another project.
5. Sew the triangles together for the top and bottom borders. Sew the border strips to the top and bottom of the quilt, matching the border centers with the quilt center and pinning the ends. Trim the strips even with the quilt as needed.
6. Sew the triangles together for the side borders, using a half-square triangle cut from a feature print 7˝ × 7˝ square on one end of a border if you need more length for the border sections.

7. Sew the side borders to the quilt, matching the border centers to the quilt center and pinning the ends. Trim the borders even with the top and bottom borders.
That’s it—your quilt top is complete.
QUILTING
I quilted Color Works with perle cotton #8 in a variety of colors. Generally, with a quilt that has a lot of color and print fabric, I follow the setting lines of the blocks. This way the lines and shapes are accented, the quilt is stabilized, and the fabrics are left to be the feature.
