Be Merry: Primitive Appliqué for Your Holiday Home
Posted by Martha Walker on Oct 6th 2015
For our continuation of National Sewing Month into October, please welcome to the blog today Martha Walker, author of Be Merry!
'Tis the season to be merry! Well, not exactly, but it's certainly a good time to get your holiday projects done so that they're ready to be displayed in all their glory when the season is here!
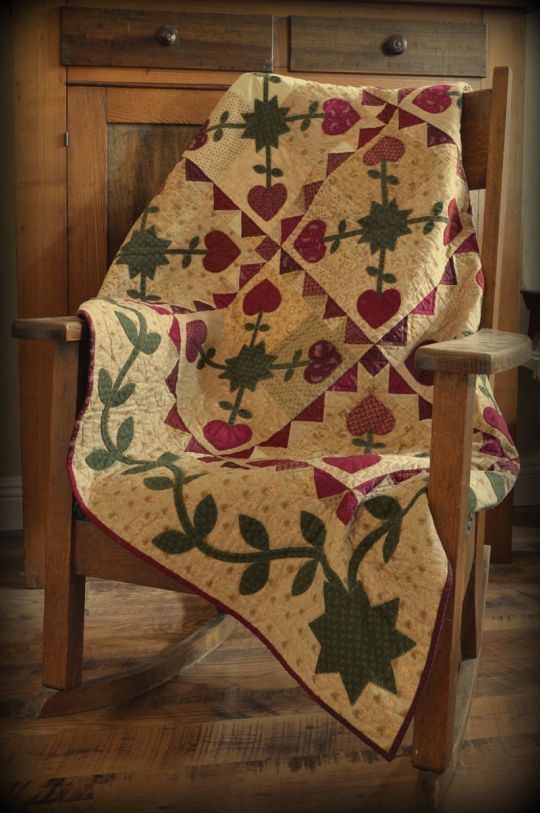
In my book, Be Merry: Quilts and Projects for Your Holiday Home, there are many projects that you can begin now and have ready in just a few short months. One of the quilts, Holiday Hearts, is just such a project if you use the technique that I did to appliqué your shapes.

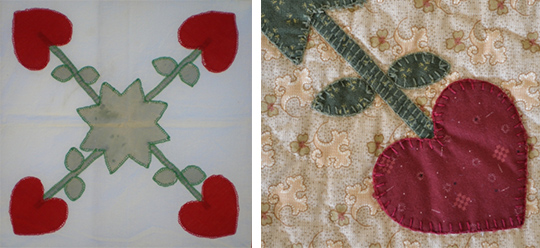
My quilt is based on a block that I found amongst a box of scraps that I inherited from my grandmother.

I loved the folk art design and decided to create a quilt based on the block. I also decided to try the same "primitive" appliqué technique that was used in the block. It turned out to be an incredibly fast way to appliqué. My quilt has been washed, and the appliqué still looks great. The stitching is sturdy, and because it doesn't employ fusibles, your quilt will be heirloom quality and will continue looking beautiful for years to come.
To begin, cut your appliqué shape without adding a seam allowance.
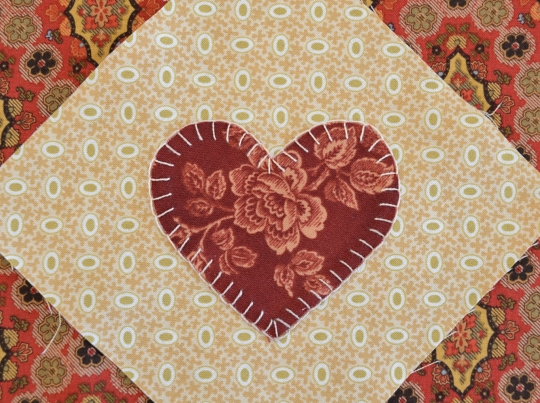
Pin baste your shape onto the background fabric. For appliqué, I like to use appliqué pins, either ½˝ long or ¾˝ long, depending on the size of the appliqué piece. For the following tutorial, I used ½˝ long pins on one side of the heart, and ¾˝ long pins on the other half.
Use a #24 chenille needle, embroidery floss or perle cotton, and a blanket stitch to appliqué your shape to the background. Three-ply embroidery floss, #12, #8, and #5 perle cotton all work well. For a really chunky look you could even use #3 perle cotton.

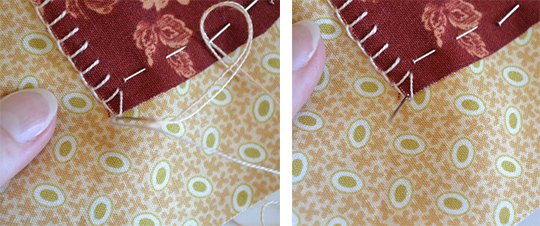
To blanket stitch appliqué, bring your needle and thread from the bottom to the top at the edge of your shape.
Take your next stitch into the appliqué as shown below, and up again near the edge, right next to your initial stitch. Keep the thread length (tail) under your needle.

Pull the needle and thread in the direction of your stitch. Don't pull too tightly, or your work will begin to curl. Keep a nice even tension as you stitch.
Take your second stitch. For a pretty stitch, the space between stitches (the length) should be approximately the same as the width of your stitches, i.e., if the width of the stitch is ¼˝, space your stitches ¼˝ away from each other. The size of your stitch is proportional to the size of your shapes. Small appliqué shapes, smaller stitches.

For sharp points, take an extra stitch at the point to secure the stitch and keep it from becoming distorted.

Bring your needle up in back of the stitch to continue blanket stitching the next side.
This is a stress free way to do appliqué, resulting in a charming, folk art look to your quilt!

Want to win a copy of Be Merry so you can put your new skills to use? Enter our giveaway here: a Rafflecopter giveaway! Winner will be announced one week from today. Open to US residents only.
Congratulations to Chris S., winner of this giveaway! We hope you find lots of great holiday projects to make, Chris!


