

3 Tips for Inserting a Magnetic Snap
Posted by Sarah Markos on Jul 2nd 2024
Hello Sewing Friends! I’m Sarah Markos from Blue Susan Makes and I’m happy to be here today to share with you 3 of my best tips for inserting a magnetic snap. Before we get started I want to let you know that I share all these tips and more in my Garden Tiles Bag video course. I’d love for you to check it out and let me know what you think!
3 Tips for Inserting a Magnetic Snap
Have you ever made a beautiful handbag only to have the magnetic snap rip out as you are using it? Well today I’m going to show you a few things you can do to make inserting a magnetic snap easier and ensure your snap is able to withstand the wear and tear of everyday use.

Tip #1 ALWAYS use an extra placement disc to protect your fabric.
Each magnetic snap comes with 4 parts: two sides with prongs and 2 metal discs. Did you know you’ll also need to cut an extra disc that is a little bigger than the metal disc? This extra disc prevents the sharp edges of the metal disc from cutting into the fabric as you open and close the snap during use.
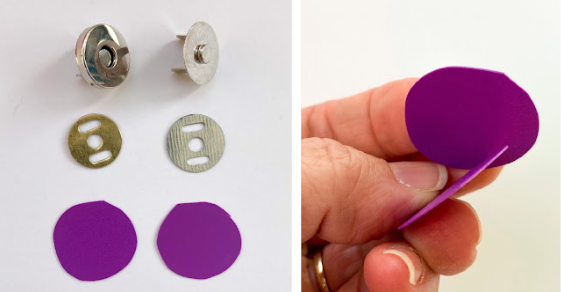
I like to use a piece of a plastic folder because it's thin and flexible, but you can also use cereal cardboard, plastic shelf liner, or felt instead. Just draw lines and cut slits in your extra disc to match the placement disk. You may ask, “What if I already used interfacing on my fabric?” Add this extra disc anyway, it really helps!
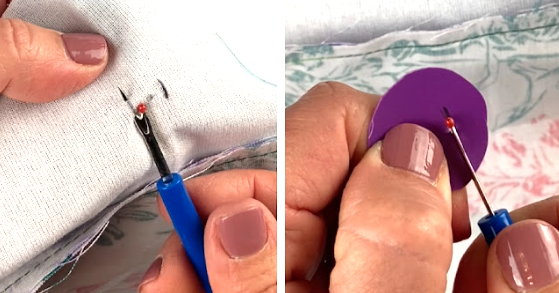
Tip #2 Use a Seam Ripper to cut the perfect sized slits.
To install your snap, you’ll need to cut a small slit in your fabric to slide the prongs through. It is really easy to cut these holes bigger than you want to, especially if the tips of your scissors aren’t too sharp. Instead of cutting the slits with scissors you can use a seam ripper to cut them to EXACTLY the right size. Just slide the point of the seam ripper in one end of the drawn slit line and out the other, just like a pin, and give it a push.
This should work even if you’ve fused interfacing to the lining. Try it on a scrap fabric to make sure your seam ripper is sharp enough but it should be. You can also use it to cut the slits in your extra placement disc!
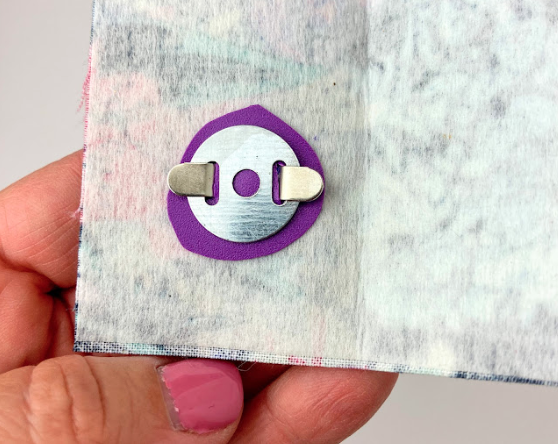
Tip #3 - Use a tool to bend the prongs and save your fingers.
Once you have all the parts of the snap together the final step is to bend the prongs out so they lay flat. Sometimes it is really tricky and painful to get the prongs to bend using your fingers, especially if you are using a high quality snap.
Instead of using your fingers, save your hands and grab the handle of any tool (like a screwdriver) and press it down between the prongs and they will easily start to bend. You can use the handle to press them all the way flat or use your fingers to finish them off now that the hard work is done!
That’s it! I hope these tips will help you on your bag making journey. Please take a look at my Garden Tiles Bag Video Course and check out my sewing blog, Blue Susan Makes, where you’ll find free tutorials and more tips like these. If you like my style you can also follow me on Instagram, Facebook, and ETSY.
Happy Sewing!
...
A playful maker at heart, Sarah Markos gravitates toward vibrant, colorful fabrics to create unique sewing projects. Over the years, she has dabbled in garment-making, quilting, and sewing, creating projects from Halloween costumes to pillows to quilts. Sarah's favorite craft of all is bag making. Never lacking in handbag design ideas, Sarah thrives in developing creative ways to level up her craft. Having learned many skills and techniques through trial and error, she is eager to share only the best with her Creative Spark students so they can feel the joy of making handmade treasures.


